Understanding the Paper
When it comes to origami, the type of paper used plays a crucial role in the success of the final creation. Understanding the characteristics of paper is essential for achieving desired results in origami projects. Different types of paper offer varying degrees of thickness, flexibility, and texture, impacting how well the paper can hold folds and creases.
Origami paper is typically lightweight and square in shape, designed specifically for creating intricate folds and shapes. It is important to choose paper that is crisp and holds creases well to ensure the final piece maintains its form. Additionally, considering the color and pattern of the paper is also important, as they can enhance the visual appeal of the origami creation.
Types of Paper Suitable for Origami
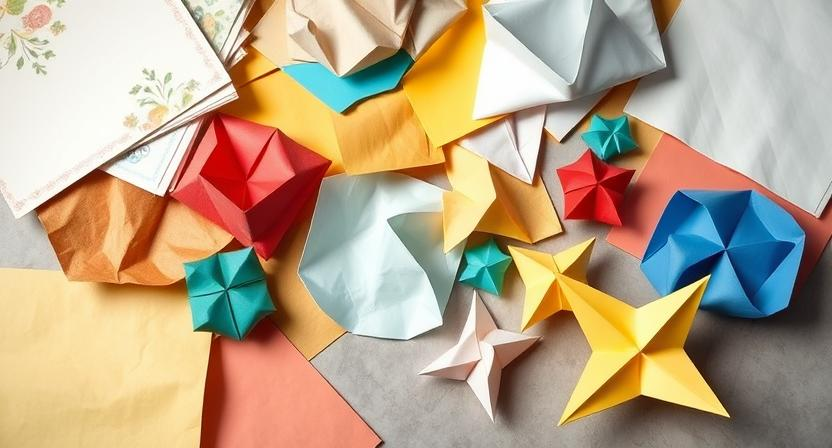
When it comes to origami, the choice of paper plays a crucial role in the success of your project. Origami paper, also known as kami, comes in various types and textures that can enhance the final look of your creation. One of the most common types of paper used for origami is the traditional Japanese washi paper, which is lightweight yet sturdy, making it perfect for intricate folds and designs. Washi paper is available in a wide range of colors and patterns, allowing for endless creative possibilities in your origami projects.
Another popular option for origami enthusiasts is the foil paper, which adds a shiny and metallic finish to your creations. Foil paper is ideal for creating eye-catching designs that stand out and catch the light, making it a favorite choice for more decorative origami pieces. For those looking for a more eco-friendly option, recycled paper or even newspaper can be a suitable choice for origami projects. These types of paper may have a slightly different texture and weight than traditional origami paper, but they still offer a unique and sustainable alternative for paper folding enthusiasts.
• Washi paper is lightweight yet sturdy, perfect for intricate folds
• Available in a wide range of colors and patterns for endless creative possibilities
• Foil paper adds a shiny metallic finish to creations, ideal for eye-catching designs
• Recycled paper or newspaper offer eco-friendly options for origami projects
• These papers may have slightly different textures and weights than traditional origami paper
Choosing the Right Paper Thickness
When it comes to origami, choosing the right paper thickness is crucial for the success of your project. The thickness of the paper will affect how well it holds creases and shapes, as well as the overall appearance of your origami creation. Generally, thinner paper is more suitable for complex designs that require intricate folds, while thicker paper is better for simpler models that need more structural stability.
Thin paper, such as kami or origami paper, is commonly used for traditional origami designs as it allows for crisp folds and intricate details. On the other hand, thicker paper like cardstock or watercolor paper is ideal for projects that require more durability and strength, such as modular origami or large-scale sculptures. It’s essential to consider the complexity of the design and the desired outcome when selecting the paper thickness for your origami project.
Paper Size Considerations
When it comes to origami, the size of the paper can significantly impact the outcome of the project. Choosing the right paper size is crucial for achieving the desired result. Larger paper sizes are ideal for beginners as they provide more space to work with and are easier to handle. On the other hand, smaller paper sizes are more suitable for intricate designs that require precise folding and detailing.
Apart from the complexity of the design, the paper size should also be chosen based on the final size of the origami piece. For larger models, it is recommended to use paper that is at least 6 inches in size to ensure that there is enough material for the folds. Conversely, smaller models can be made using paper as small as 3 inches, allowing for more delicate and intricate creations. Ultimately, the paper size should be selected based on the specific origami project and the level of detail desired.
How to Properly Fold the Paper
To properly fold paper for origami, start by ensuring that you have a flat and clean work surface to prevent any creases or wrinkles. Carefully follow the folding diagrams or instructions provided for the specific origami model you are making. When folding, make firm and precise creases using your fingers or a bone folder to ensure sharp and clean folds. Remember to always align the edges of the paper accurately before making each fold to maintain symmetry and precision in your origami creation.
It is important to take your time with each fold, ensuring that it is crisp and accurate. Rushing through the folding process can lead to mistakes and result in a less polished final product. Practice patience and precision, paying close attention to details such as matching up corners and edges before creasing. By focusing on the quality of each fold and taking the time to execute them correctly, you will be able to create stunning origami pieces with precision and finesse.
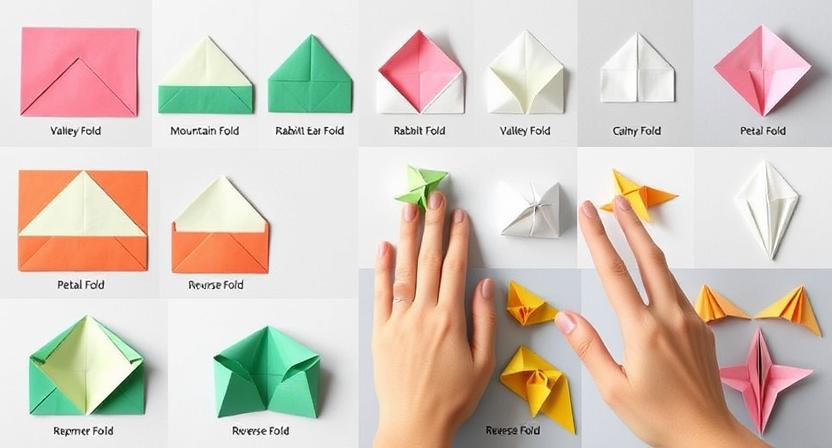
Mountain Fold Technique
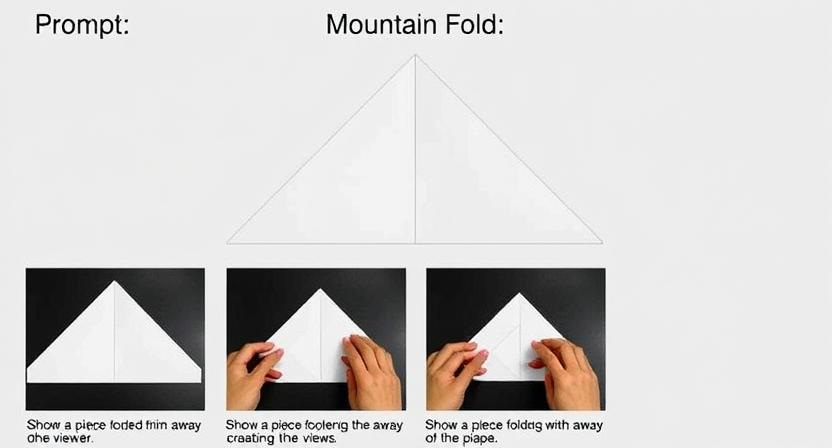
The mountain fold technique is a fundamental origami fold that creates a peak in the paper, resembling a mountain when folded. To execute this fold, simply fold the paper away from you along the designated crease line, creating a triangle shape with the tip pointing upwards. Press down firmly on the crease to secure the fold in place.
When mastering the mountain fold technique, it is essential to ensure that the crease is crisp and sharp to maintain the integrity of the fold. Precision is key in origami, so take your time to accurately fold the paper along the designated lines. Practice this technique repeatedly to enhance your skills and achieve clean, professional-looking mountain folds in your origami creations.
Valley Fold Technique
To execute a valley fold in origami, start by folding the paper in half vertically, creasing it, and then unfolding it. Next, bring the top edge of the paper down to align with the center crease created in the previous step. Press down to create a sharp valley fold along the new crease. Ensure that the edges are perfectly aligned to maintain accuracy in the fold. Valley folds are commonly represented by dashed lines in origami diagrams.
Practice the valley fold technique with different types of paper to understand how each material behaves during folding. Thicker paper may require more pressure to create crisp folds, while thinner paper can tear easily with excessive force. Experiment with various paper thicknesses to find the one that suits your folding style the best. Remember, precision and patience are key in mastering the valley fold technique.
How to Make a Crease
To make a clean and precise crease in origami, start by aligning the edges of the paper that you want to fold. Using your thumb and forefinger, firmly press along the edge where the fold is supposed to be made. Applying even pressure and running your fingers along the length of the fold will help in creating a sharp and defined crease. Make sure to hold the paper securely in place to prevent any shifting that could result in a messy fold.
Once you have pressed along the crease line, use your fingernail or a bone folder to reinforce the fold. Running the edge of the tool along the crease helps in making the fold crisper and more defined. Take your time to ensure that the crease is well-pressed and sharp before moving on to the next step in your origami project.
Importance of Accurate Folds
Accurate folds are paramount in the art of origami. Each crease plays a crucial role in determining the final outcome of the folded model. Precision in folding ensures that the paper retains its shape and form, allowing for the creation of intricate designs with clean lines and smooth edges.
Even the slightest deviation from the intended fold can lead to a significant difference in the appearance of the origami piece. Inaccuracy in folding may result in misaligned edges, uneven proportions, or a model that fails to hold its structure properly. Therefore, taking the time to execute each fold with precision is essential in achieving a satisfying and aesthetically pleasing result in origami creations.
Common Mistakes to Avoid
When practicing origami, it’s essential to be aware of common mistakes that beginners often make. One prevalent mistake is using paper that is too thin or too thick, causing difficulties in achieving precise folds and shapes. Additionally, rushing through the folding process without paying attention to details can lead to inaccuracies and a less polished final creation.
Another mistake to avoid is neglecting to properly crease the paper. Failing to make clean and precise creases can result in a finished piece that lacks crisp edges and defined shapes. It’s crucial to take the time to accurately fold and crease the paper at each step of the origami process to ensure a successful and visually appealing outcome.
Basic Folds for Beginners
Beginners in origami often start with simple folds to get a feel for the paper and the techniques involved. The preliminary fold, also known as the kite base, is a fundamental fold that serves as the starting point for many origami models. It involves folding the paper in half diagonally to form a triangle shape, which can then be used as the foundation for various designs. This basic fold is essential for mastering more complex origami creations.
Another basic fold that beginners can practice is the squash fold. In this fold, the paper is manipulated to create a flatter shape by bringing the edges towards the center. The squash fold is commonly used to add details and dimensions to origami models, making it a versatile technique for beginners to learn. By mastering these basic folds, beginners can build a strong foundation for tackling more intricate origami designs in the future.
The Preliminary Fold
The preliminary fold is the foundational step in the art of origami. It acts as the starting point for creating intricate designs from a simple piece of paper. This basic fold serves as the anchor for more complex folds that follow, setting the stage for the transformation of a flat surface into a three-dimensional masterpiece.
To execute the preliminary fold, begin by folding the paper in half in one direction, ensuring that the edges align perfectly. This initial crease serves as the reference point for subsequent folds, establishing symmetry and precision in the overall origami creation. Mastering the preliminary fold is essential for beginners as it lays the groundwork for developing proficiency in more advanced folding techniques.
The Squash Fold
The squash fold is a fundamental technique in origami that involves manipulating the paper to create a flatter, more compact shape. To execute a squash fold, begin by identifying the designated point on the paper where the fold needs to be made. Gently open up the layers of paper at this point, creating a small pocket of space to work with. Carefully flatten the paper down into the desired shape, ensuring that the edges align neatly.
This fold is commonly used to add intricate details and dimensions to origami models, making it a versatile skill to master. By practicing the squash fold technique, origami enthusiasts can enhance the overall visual appeal of their creations and achieve more complex designs. Remember to take your time and pay attention to precision when performing a squash fold, as accuracy is key in producing polished and professional-looking origami art.
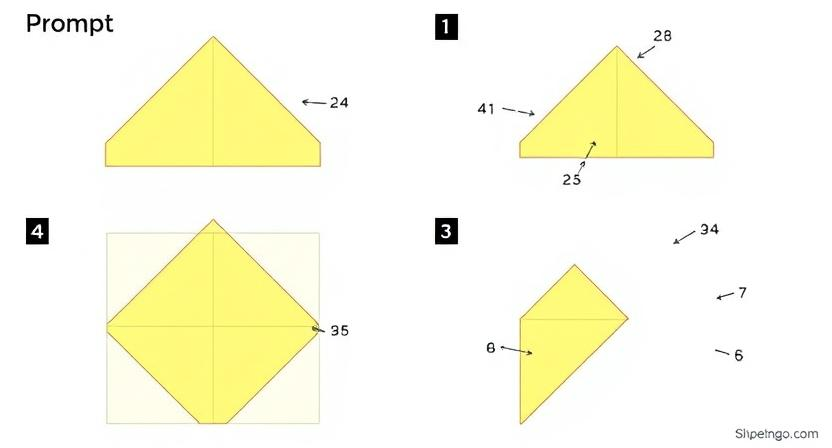
The Petal Fold
The Petal Fold is a classic origami technique that adds intricate detail and dimension to your paper creations. To perform the Petal Fold, begin with a square piece of paper and fold it in half both vertically and horizontally to create crease lines. Next, unfold the paper and fold the four corners towards the center intersection point. Then, carefully fold the outer edges along the crease lines to form the petal shape. The Petal Fold can be used in various origami designs to create realistic petals for flowers, delicate leaves, or even decorative elements for animals and objects.
Mastering the Petal Fold requires precision and patience, as each fold must be executed with care to achieve the desired outcome. It is essential to take your time and ensure that the creases are crisp and aligned correctly to achieve a clean and polished finish. Once you have mastered the technique of the Petal Fold, you can incorporate it into your origami projects to elevate the overall aesthetic and add a touch of elegance to your creations. Practice the Petal Fold repeatedly to refine your skills and explore the endless creative possibilities it offers in the world of origami.
The Reverse Fold
To execute the reverse fold in origami, start by folding the paper in half along the crease lines, forming a triangle or rectangle shape. Next, unfold the paper and carefully fold one corner to the center point of the paper. Then, flip the paper over and repeat the same fold on the other side. This technique creates a reverse fold where the paper overlaps on itself, resulting in a crisp and precise fold that adds dimension to your origami creation.
The reverse fold is commonly used in creating intricate details such as animal features, flower petals, or architectural elements in origami designs. Mastering this fold requires patience and precision to ensure the creases are aligned correctly. By practicing the reverse fold technique with different paper types and sizes, you can enhance your origami skills and create beautiful and intricate paper creations with depth and dimension.
The Rabbit Ear Fold

The Rabbit Ear Fold is a fundamental origami technique that creates a distinctive shape resembling a rabbit’s ears. To execute this fold, start by making a diagonal crease on the paper. Next, fold the paper along the crease line to the center, creating a triangular shape. Then, fold the top layer of the triangle down to form one ear. Repeat the same process on the other side to create the second ear. The Rabbit Ear Fold is versatile and can be used in various origami designs, adding dimension and character to your creations.
Mastering the Rabbit Ear Fold requires precision and attention to detail. Ensure your creases are crisp and aligned accurately to achieve symmetrical ears. Practice the fold multiple times to perfect your technique and achieve consistent results. Experiment with different paper sizes and thickness to see how they impact the final look of the rabbit ears. With patience and practice, you’ll be able to incorporate the Rabbit Ear Fold seamlessly into your origami projects, adding an element of charm and intricacy to your designs.
The Waterbomb Base
The Waterbomb Base serves as the foundation for creating various origami models, known for its versatility and simple folding technique. To create the Waterbomb Base, start with a square piece of paper and fold it diagonally in both directions to create an ‘X’ shaped crease. Then fold the paper in half horizontally and vertically to form intersecting creases. Finally, push the sides of the paper inward to collapse the folds into a smaller square, resulting in the Waterbomb Base.
This base is commonly used in creating models such as the traditional waterbomb, a simple balloon-like structure that can be further manipulated into different shapes. Once you have mastered creating the Waterbomb Base, you can experiment with different variations and designs by adding additional folds and adjustments to the base structure. This base is a fundamental element in origami and understanding its simple yet crucial folding technique can lead to creating more intricate and complex origami models.
The Bird Base
The Bird Base is a fundamental origami base that serves as the starting point for creating various bird models and other intricate designs. To achieve the Bird Base, begin with a square piece of paper and follow a series of precise folds to form a symmetrical structure. This base is versatile and can be adapted to craft a wide range of origami figures, making it a valuable technique for both beginners and advanced folders. Mastering the Bird Base provides a solid foundation for constructing complex origami creations with precision and accuracy.
The Fish Base
The Fish Base is a fundamental origami base that serves as the starting point for creating various fish and sea creature designs. To fold the Fish Base, begin by folding an origami square into a preliminary fold, followed by creating a kite shape with the paper. The next step involves bringing the top flaps down to the center crease to form a diamond shape, then flipping the paper over and repeating the process on the other side.
Once the Fish Base is formed, it can be further manipulated and shaped to create intricate origami designs such as fish, whales, and other aquatic creatures. This base is versatile and provides a solid foundation for advanced origami projects that require additional folds and shaping techniques. Practice perfecting the Fish Base to enhance your origami skills and unlock the creative possibilities it offers for crafting beautiful paper sea creatures.
Practice Makes Perfect
Developing proficiency in origami requires consistent practice and dedication. As with any skill, the more you practice, the better you become. Repetition helps to refine your folding techniques and improve your overall understanding of the art form. Start with simple designs and gradually progress to more complex models as you gain confidence in your abilities.
It’s essential to set aside regular practice sessions to hone your origami skills. Whether it’s a few minutes each day or longer sessions a few times a week, consistent practice is the key to mastering the various folds and bases used in origami. Additionally, don’t be discouraged by mistakes or imperfect creations along the way. Embrace these as learning opportunities and continue to push yourself to improve with each practice session. Remember, practice truly does make perfect in the world of origami.