Have you ever seen those cool-looking “coats” worn by performers in Japanese festivals? They’re called happi (半被) or happi-coats in English.
This super easy tutorial will show you how to fold one of these in less than 5 minutes.
It’s perfect for beginners and, similar to the origami kimono, includes a simple squash fold, which is a great way to get started with this folding technique.
Origami Happi-Coat Step-by-Step Instructions
- Difficulty: Easy
- Folding time: Less than 5 minutes
- Model designer: Traditional
- Paper we used: Kami 7.5×15 cm (2.95×5.9 in)
- This represents half of a 15×15 origami sheet.
- Recommended paper: Chiyogami 7.5×15 cm
Step 1
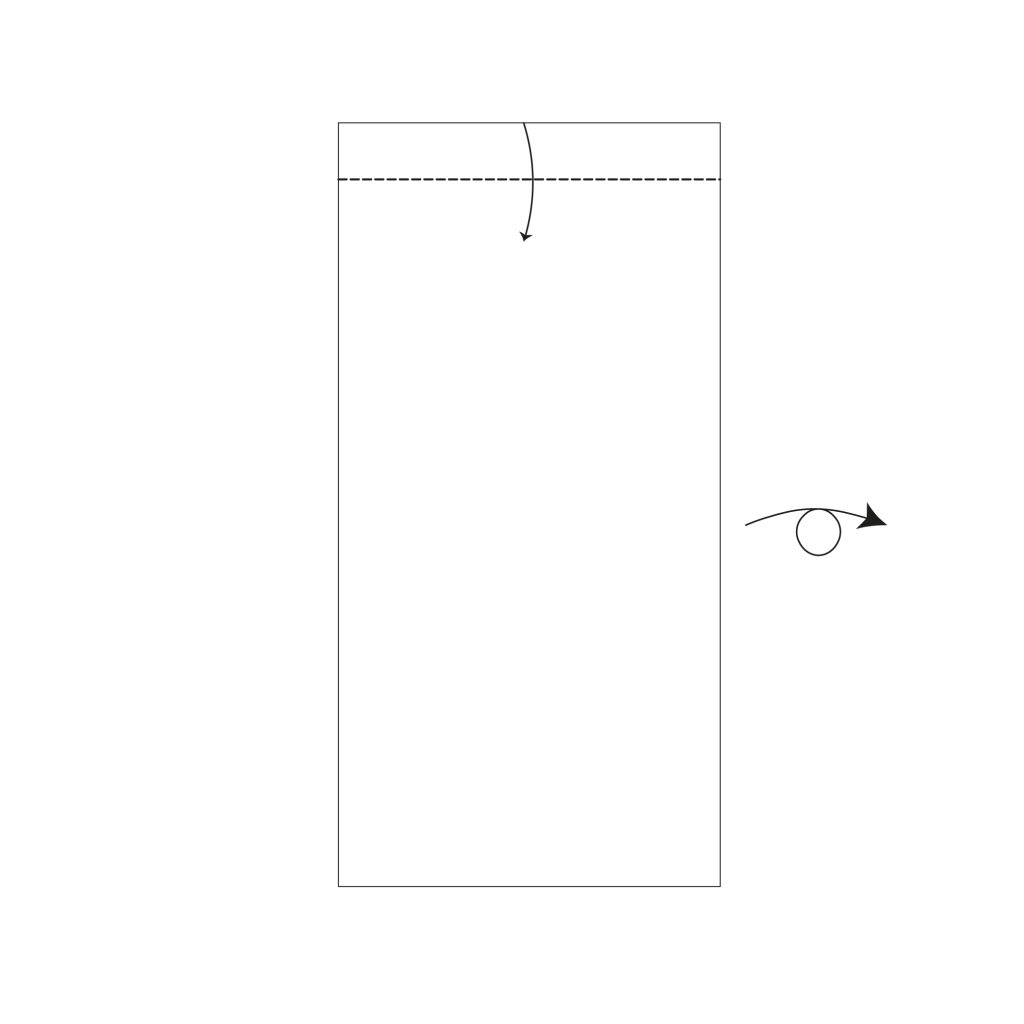
Start with a rectangular paper with the white side up. Fold a small strip at the top edge and turn the paper over.
Step 2
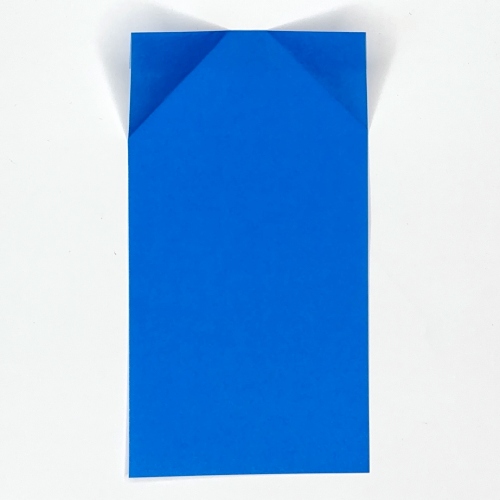
Fold the top corners along the dotted lines. If you used a 7.5×15 cm (2.95×5.9 in) paper sheet, the gap between the two edges should be between 1 to 1.5 cm (0.4 to 0.6 in). This will be the collar.
Step 3
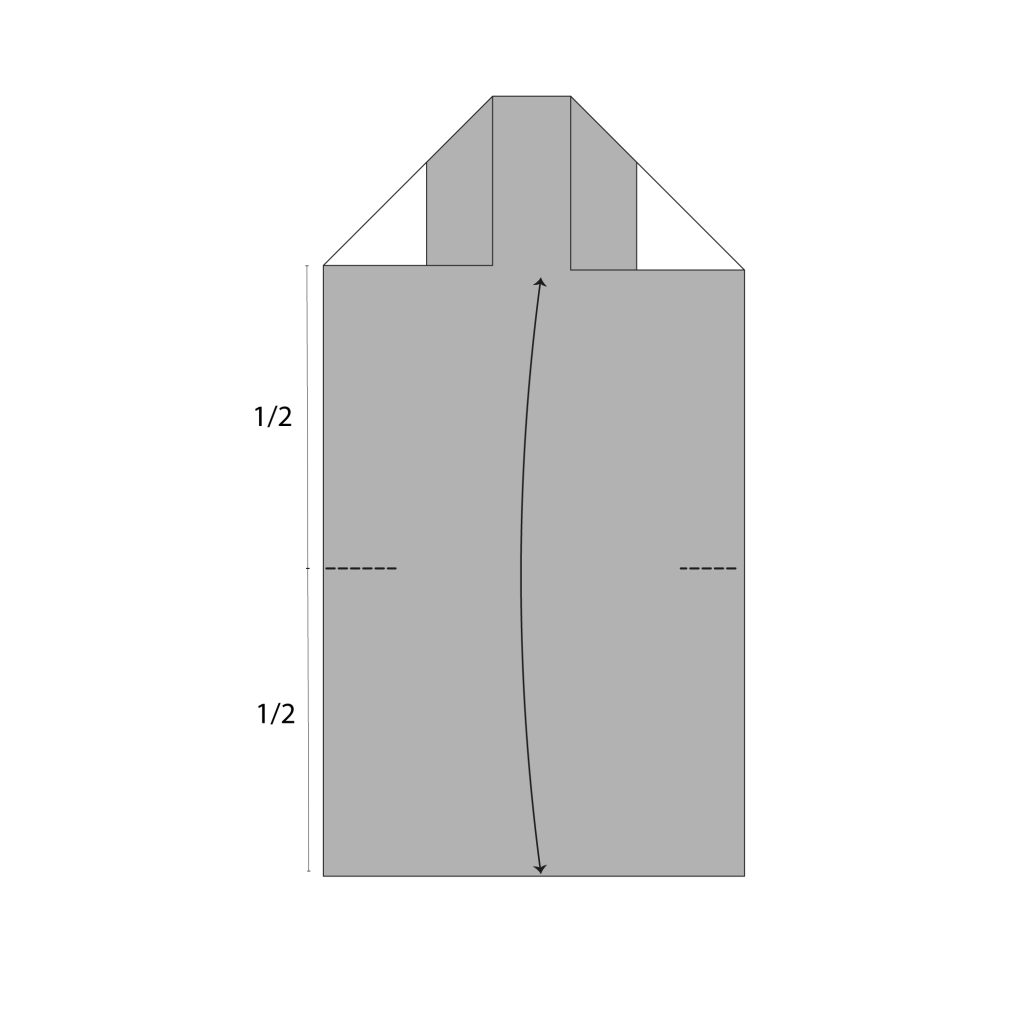
Fold the bottom edge of the paper up to the lower edge of the collar. Mark a pinch along the dotted line and then unfold it.
Step 4
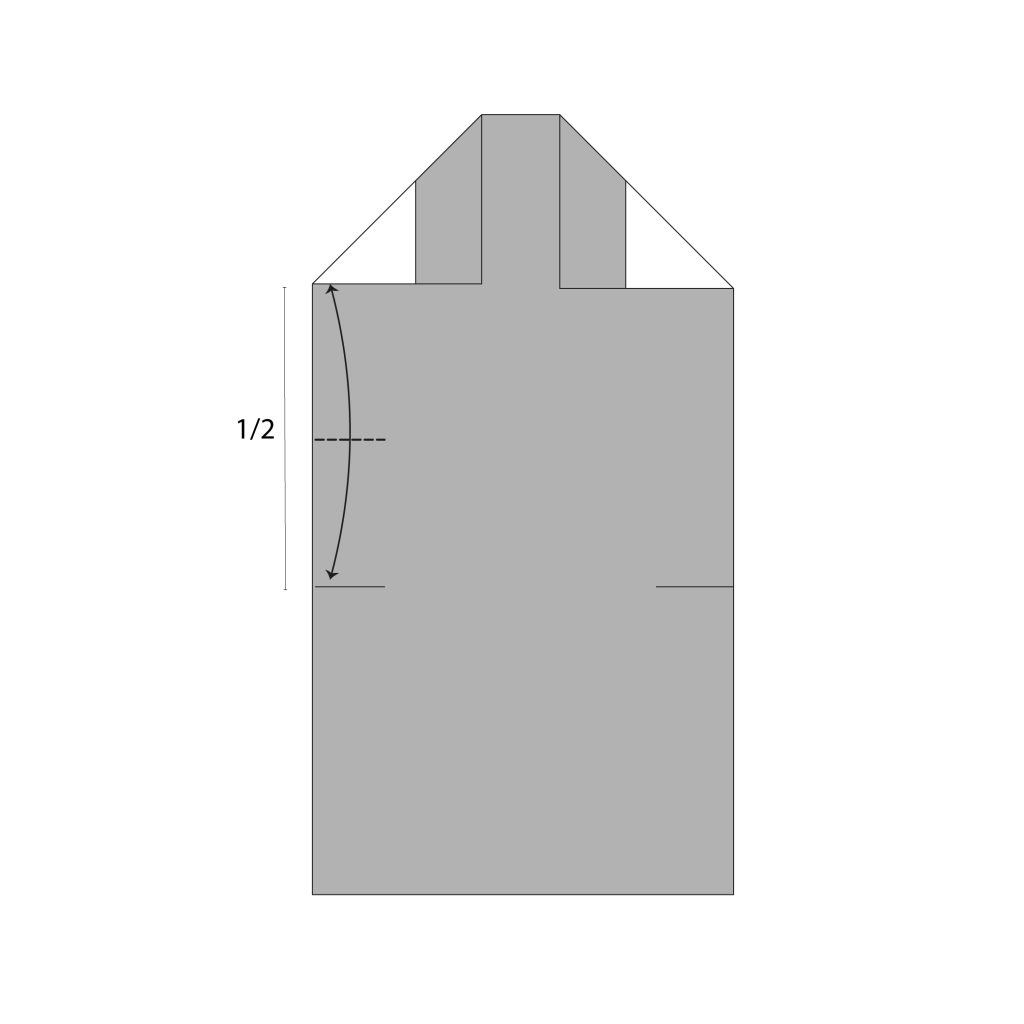
Align the new mark with the bottom edge of the collar. Indicate a pinch along the dotted line and then unfold.
Step 5
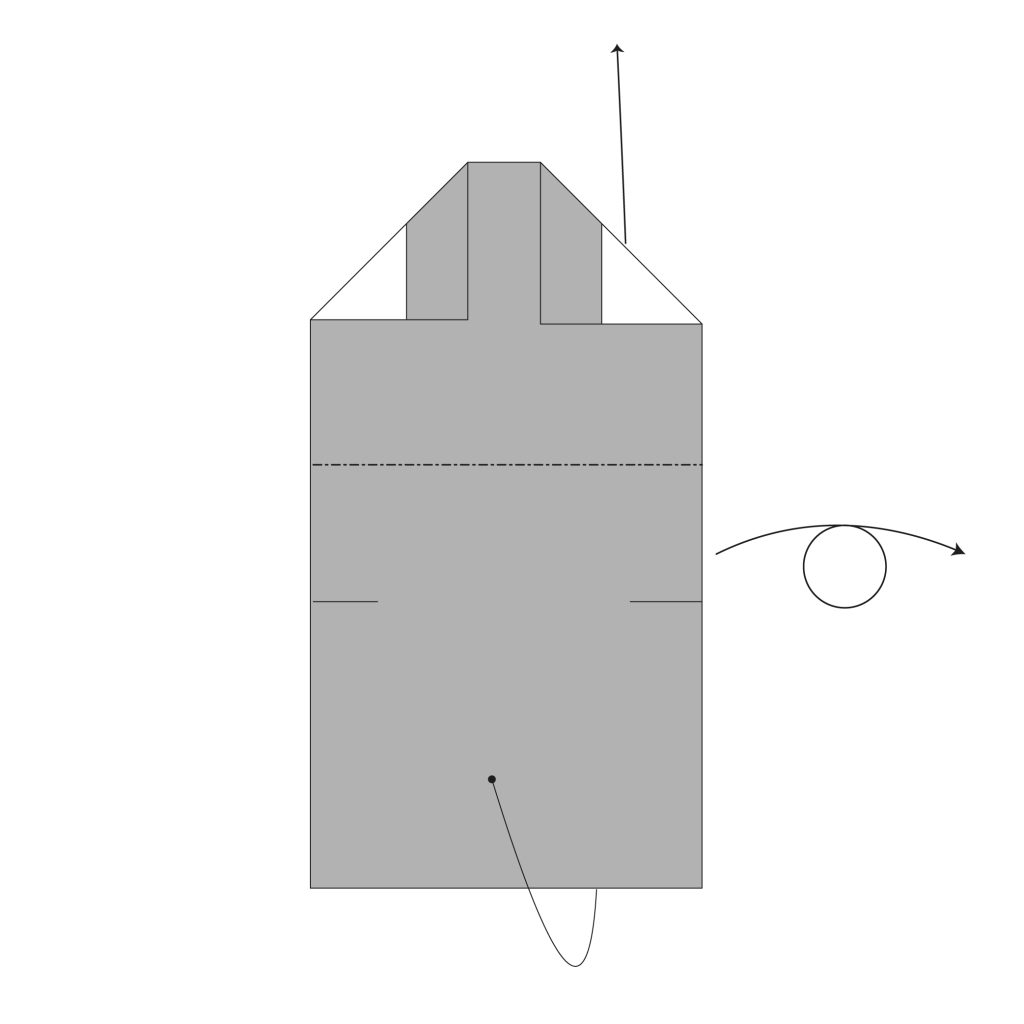
Mountain fold along the dotted line at the level of the mark created in Step 4. Turn the model over.
Step 6
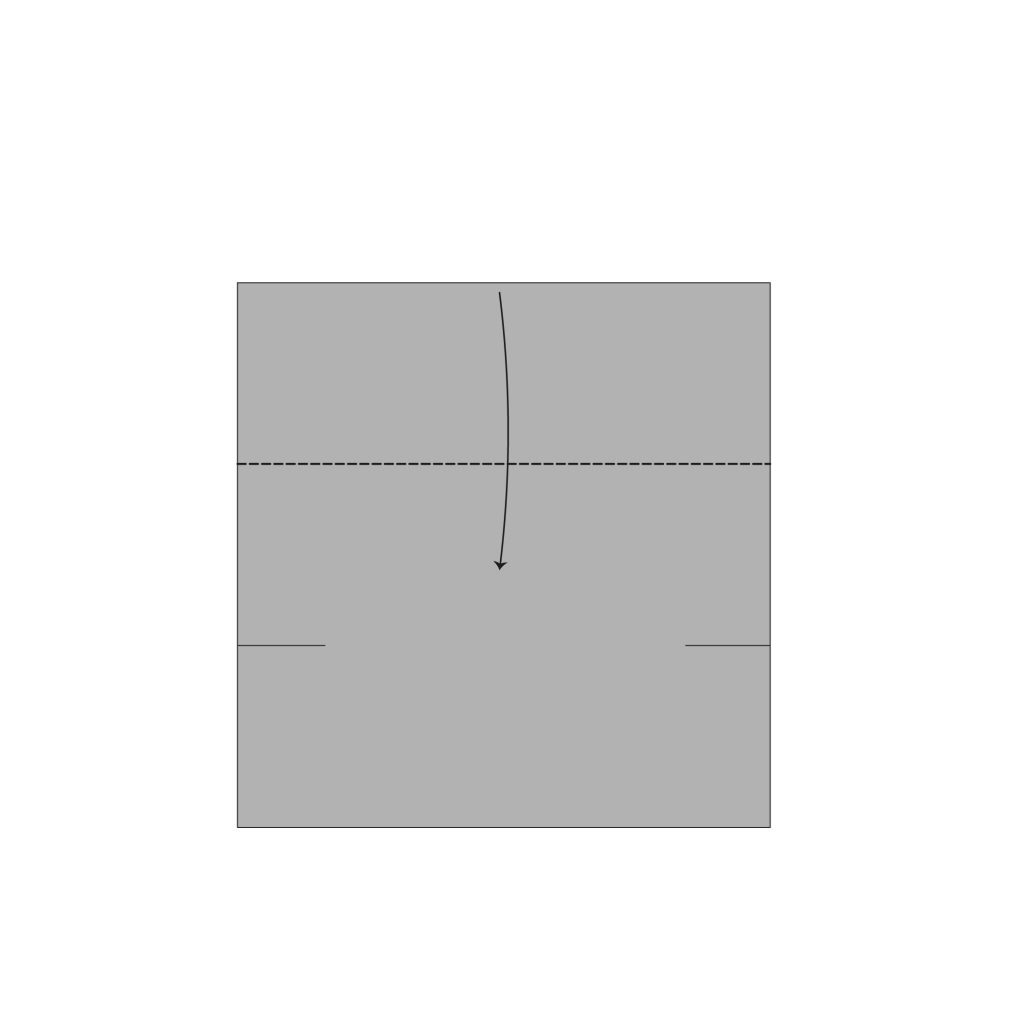
Fold along the dotted line. The new crease should align with the bottom edge of the collar. Turn the model over.
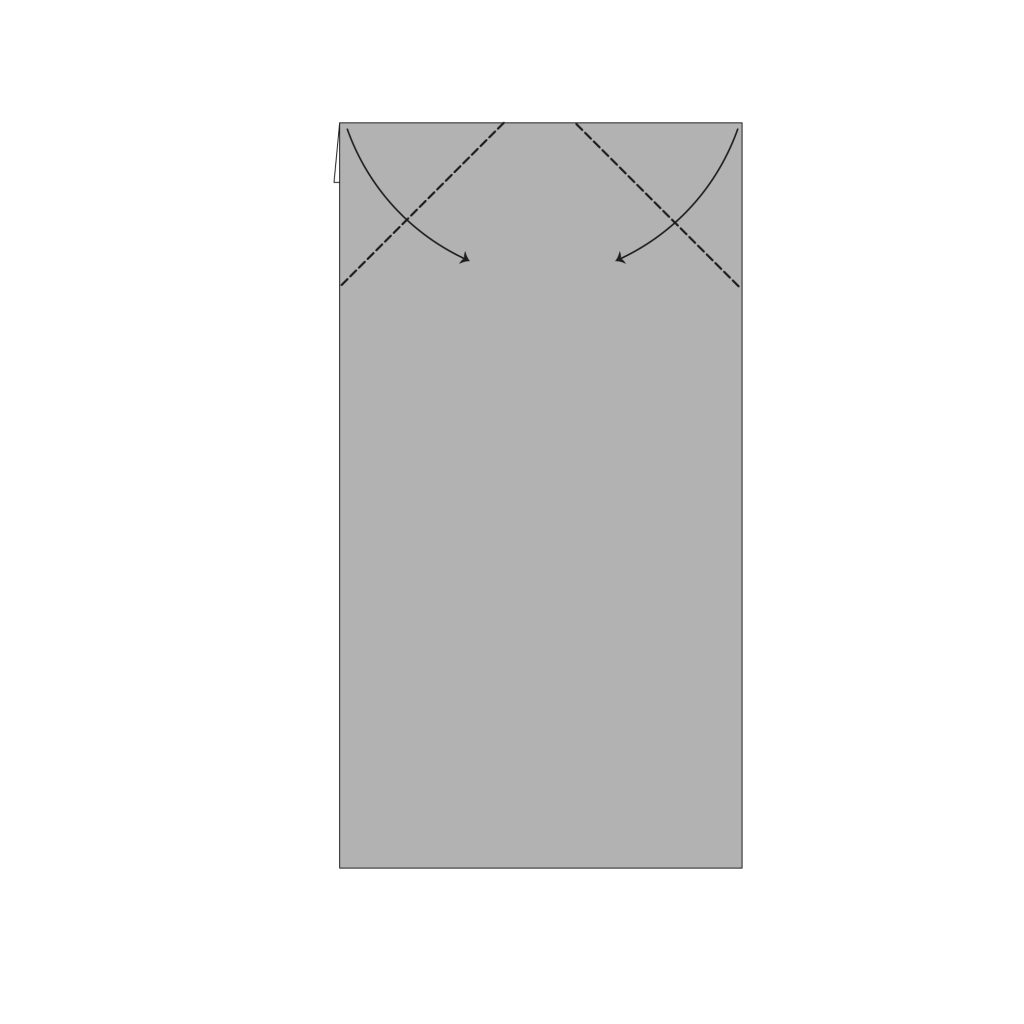
Step 7
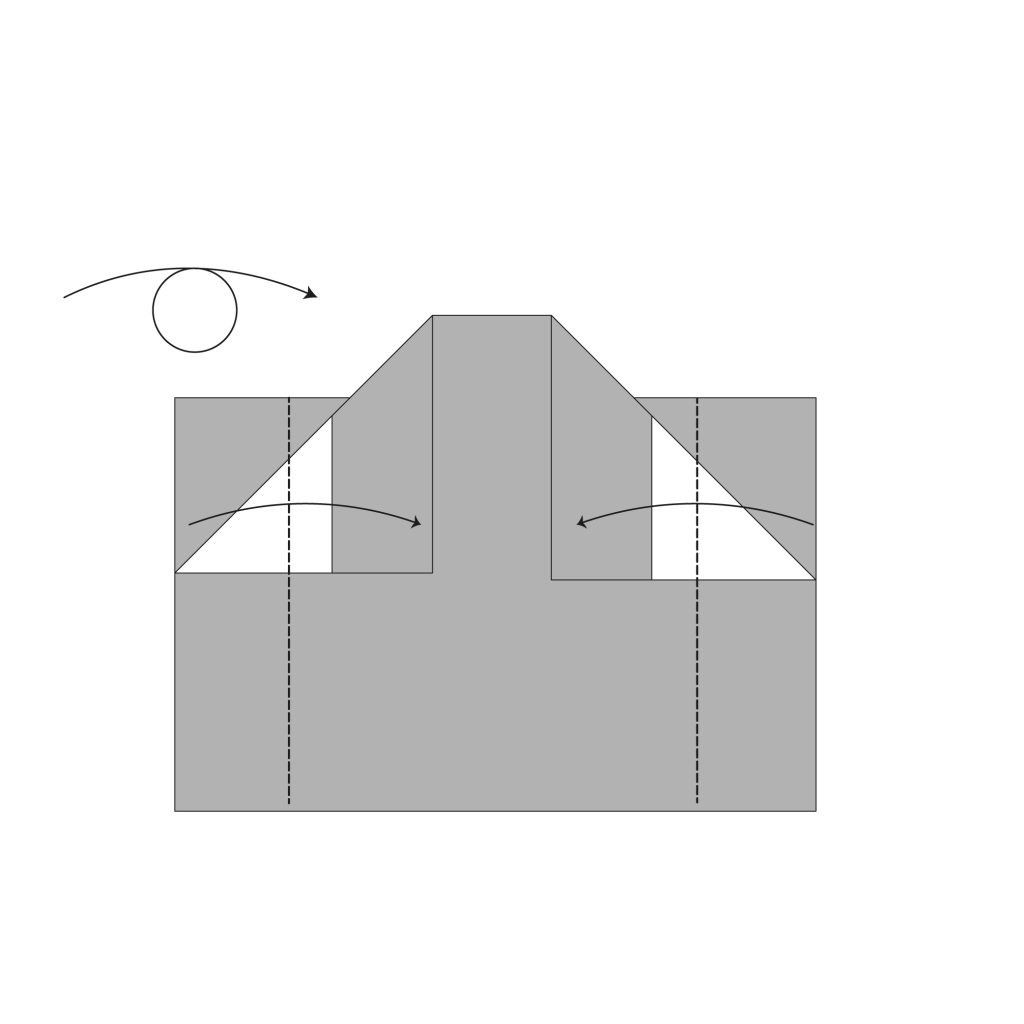
Fold along the dotted lines on both sides. Align the outer edges of the model with the inner edges of the collar.
Step 8
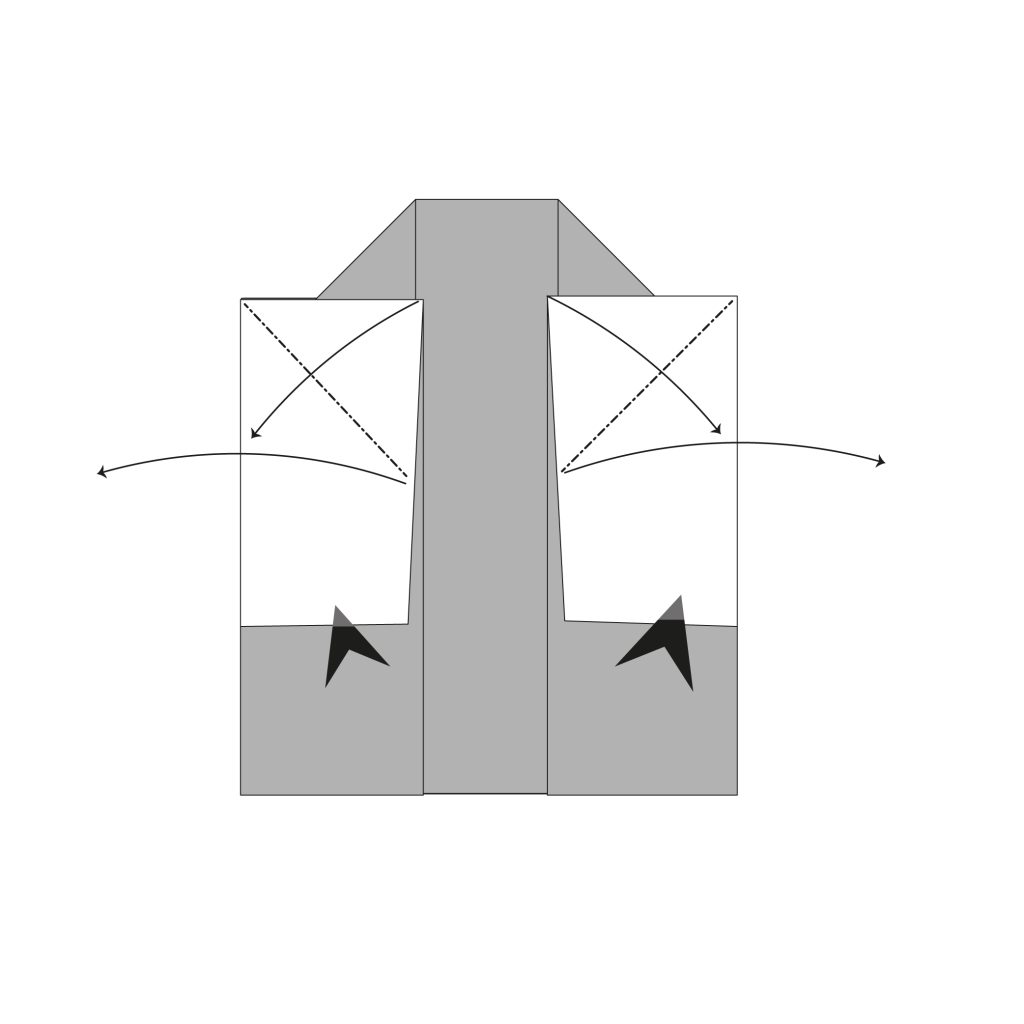
On both sides, open the top layer and squash fold as shown on the diagram to create the sleeves.
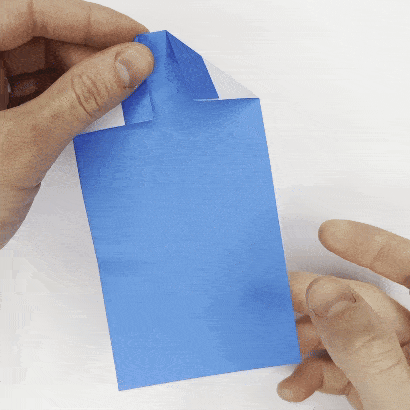
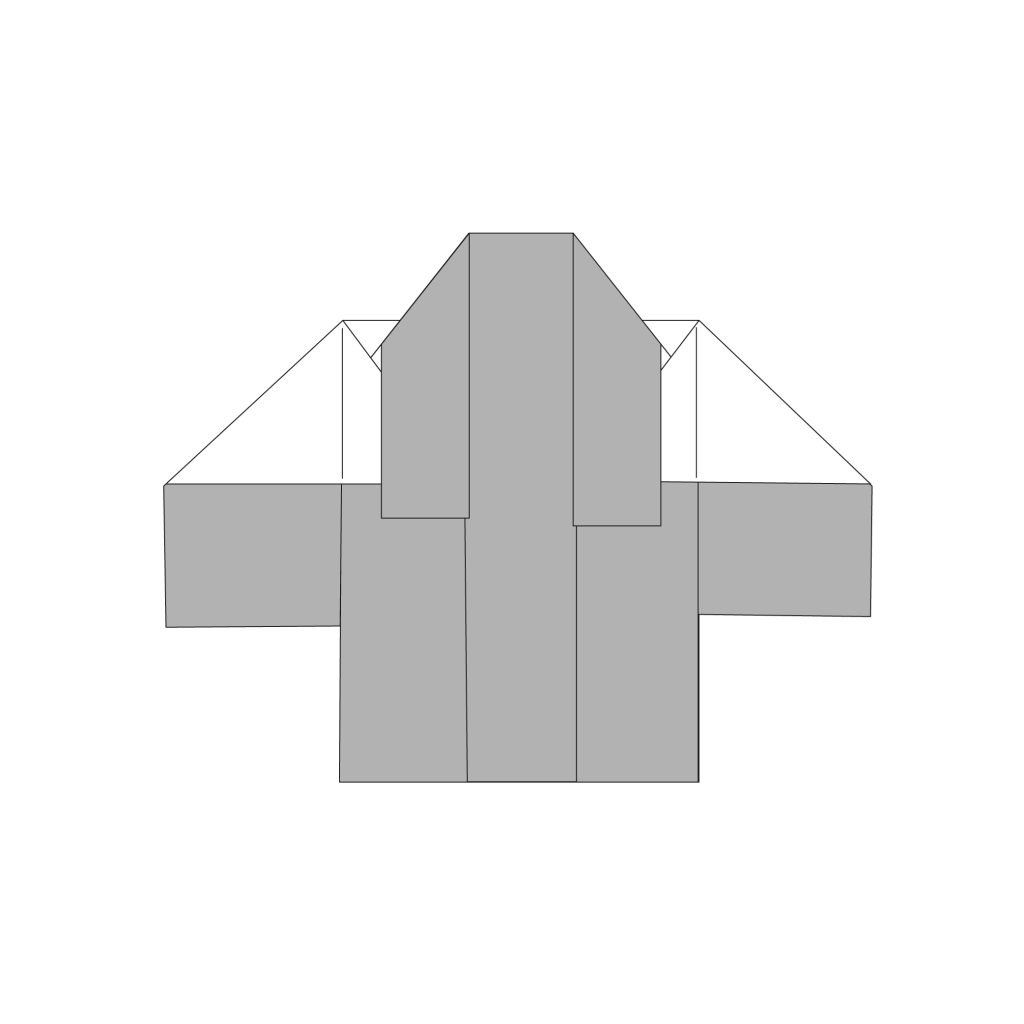
Step 9
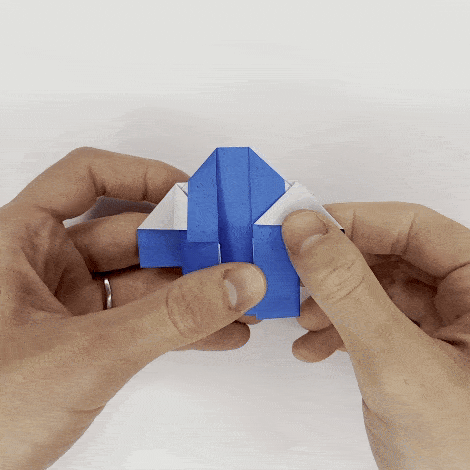
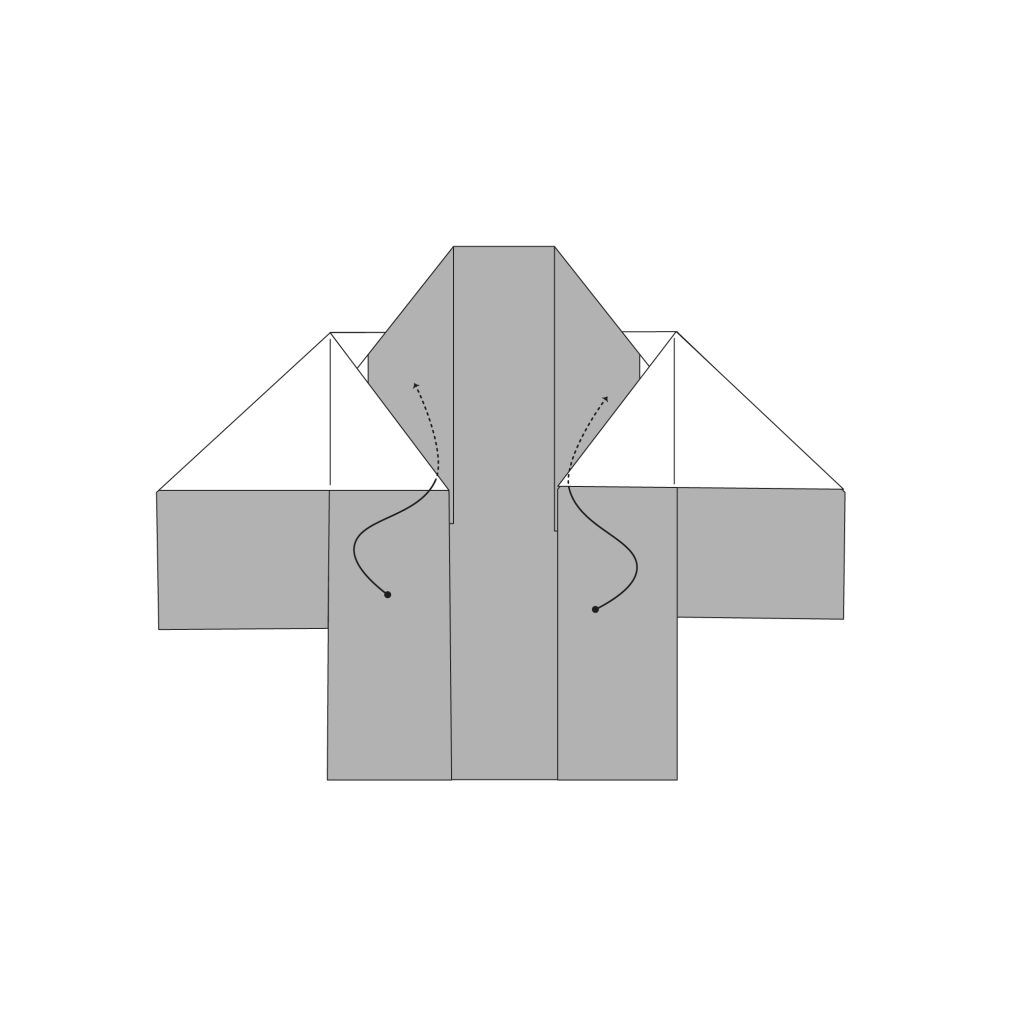
Tuck the upper layers under the collar on both sides.
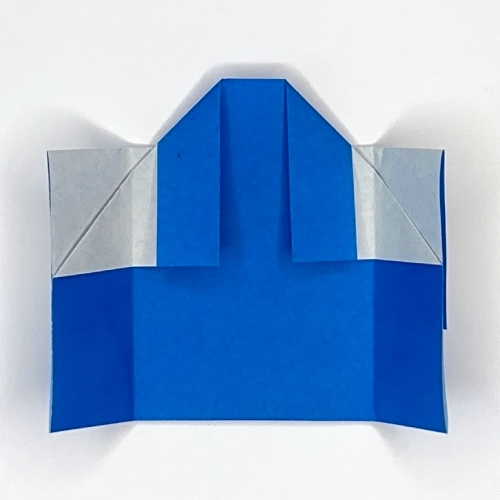
The Completed Origami Happi
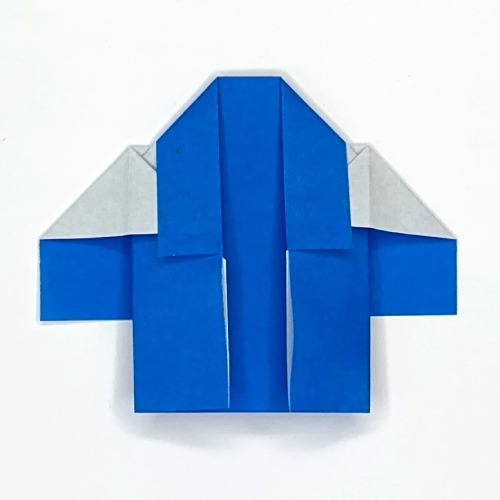
Nice work on finishing your origami happi!
You can have fun trying out different kinds of paper to give your design a whole new look.
Even though happi-coats are usually simple with plain colors, using chiyogami paper will give really nice results.
Don’t forget to share your completed models with us in the comments or on social media. We can’t wait to see how yours turned out!
The post How to Fold a Traditional Origami Happi appeared first on Origami.me.