The traditional origami balloon rabbit is an adorable design that combines the classic balloon/waterbomb shape with cute bunny ears.
This fun and whimsical project is perfect for adding a bit of playfulness to your origami collection.
This model is not only irresistible but also more accessible to beginners. Let’s grab some origami paper and create an adorable rabbit that’s sure to bring a smile to anyone’s face.
Traditional Origami Balloon Rabbit Step-by-Step Instructions
- Difficulty: Easy – Beginner Lvl 2
- Folding time: 5-10 minutes
- Model designer: Traditional
- Recommended paper: Kami 15×15 cm
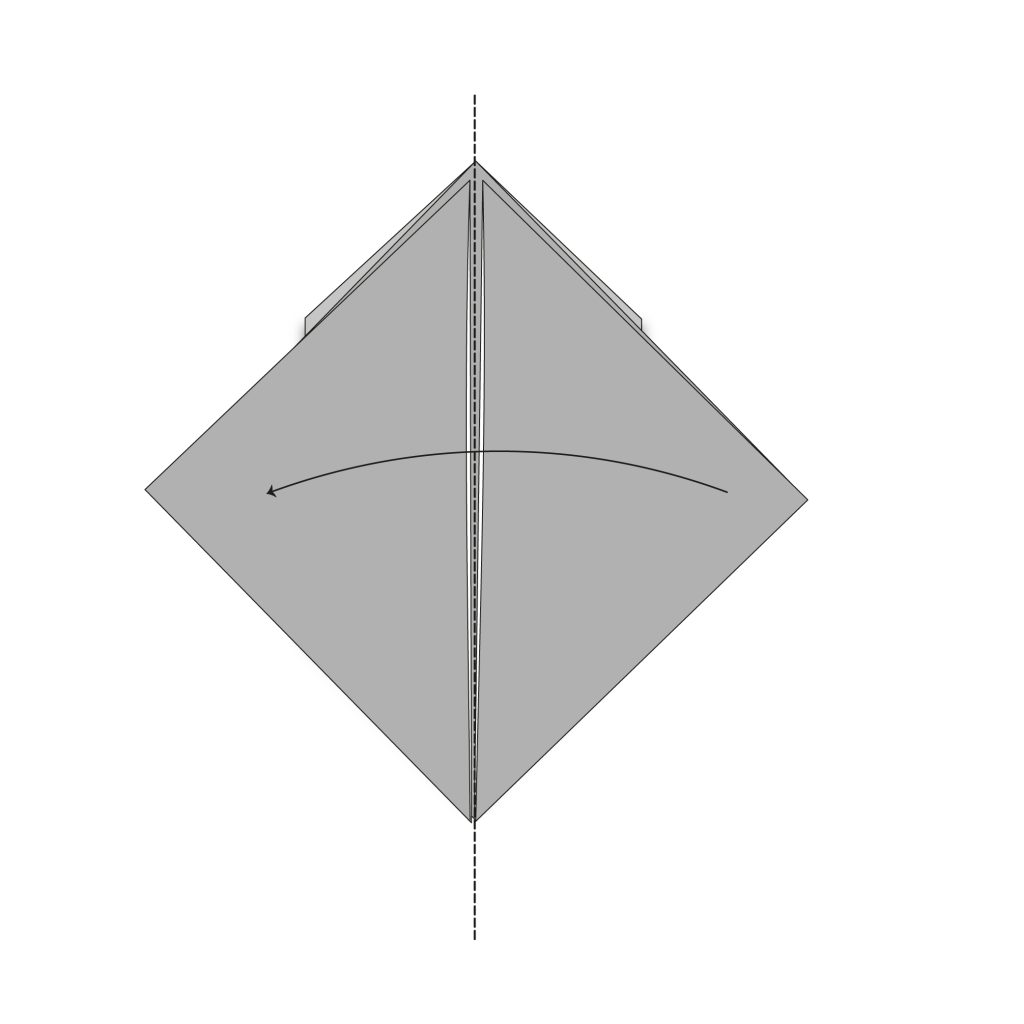
Step 1

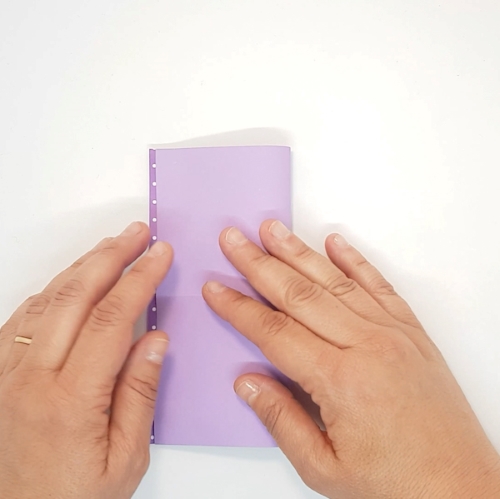
Start with the colored side of the paper facing up. Fold in half both horizontally and vertically, then unfold.
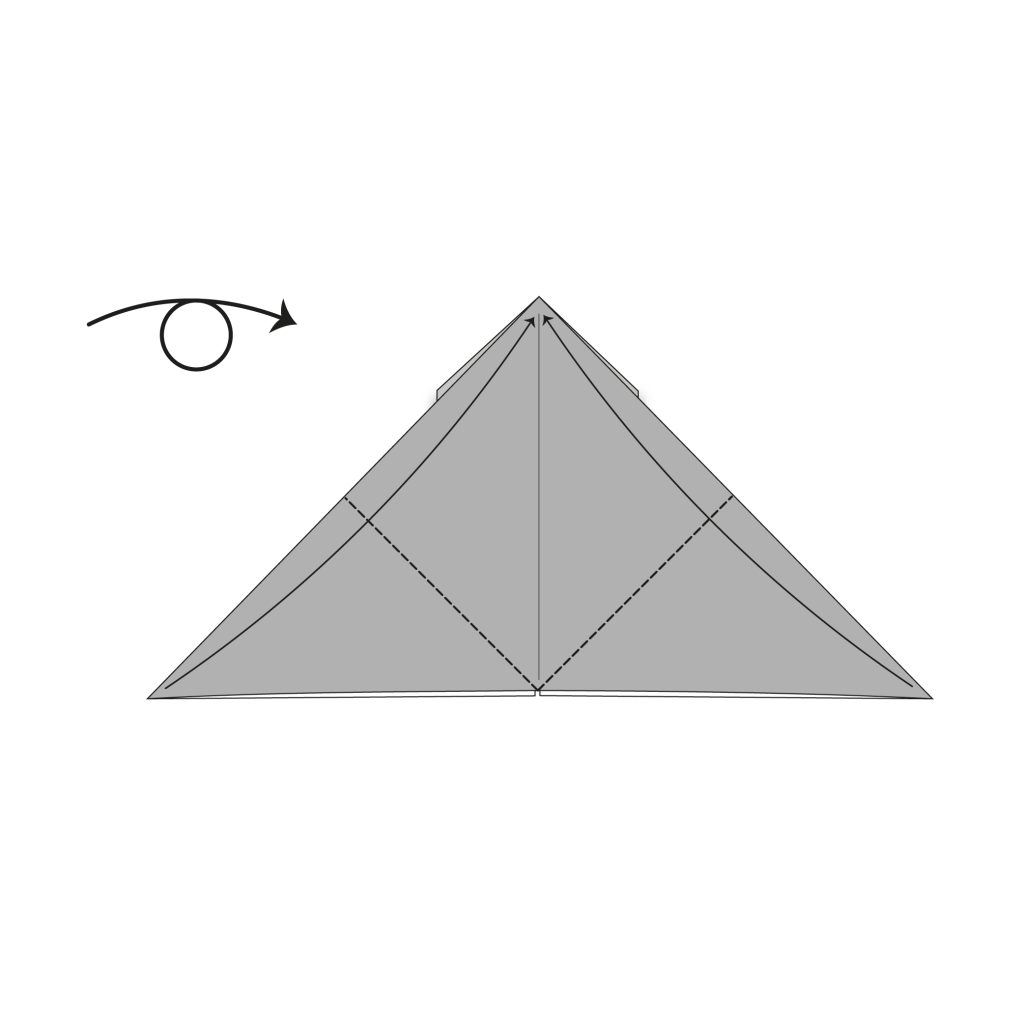
Step 2
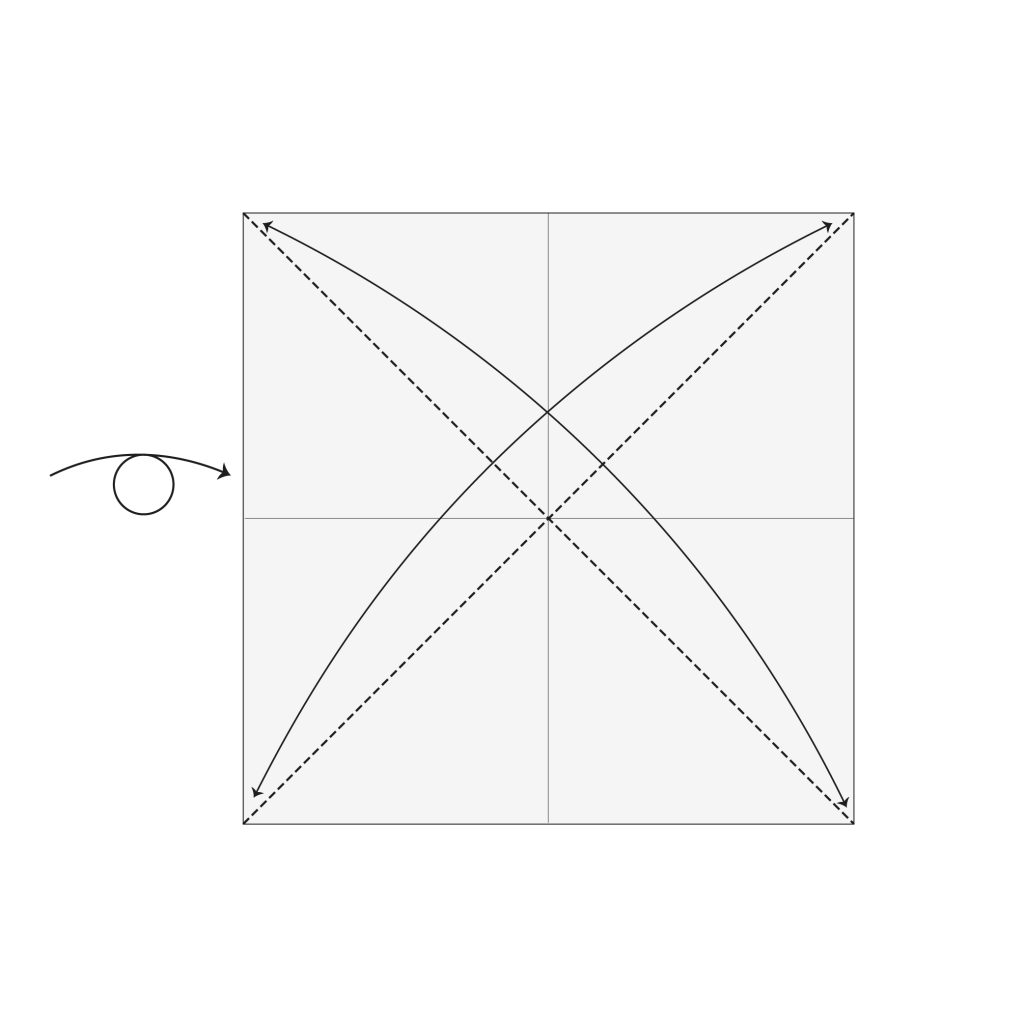
Turn the paper over. Fold and unfold along the diagonals.
Step 3
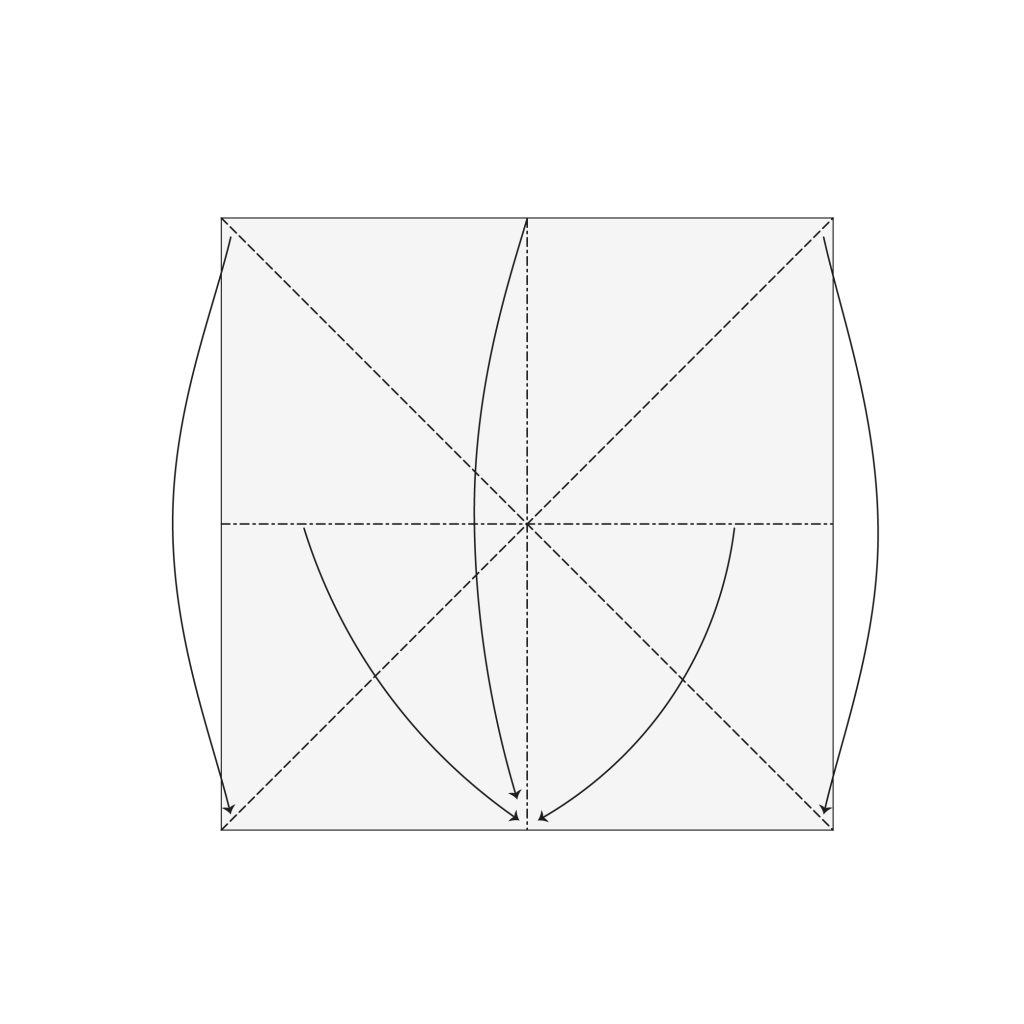
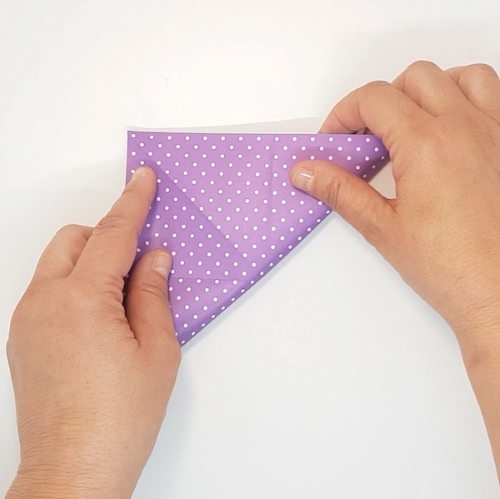
Collapse along the dotted lines to create a Waterbomb base.
Step 4
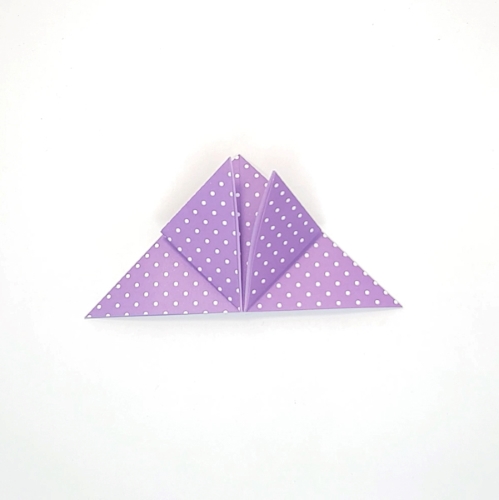
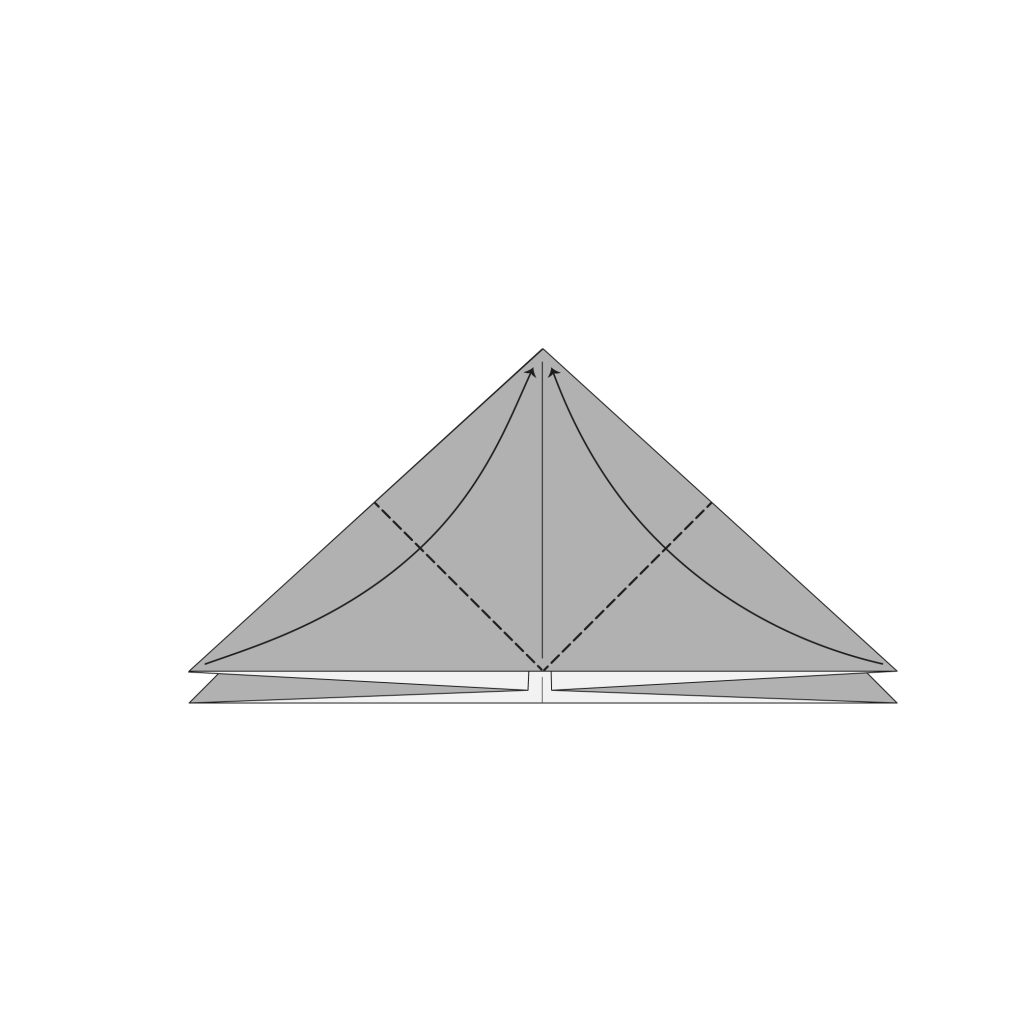
Bring the bottom corners up and fold the top layers to the central line.
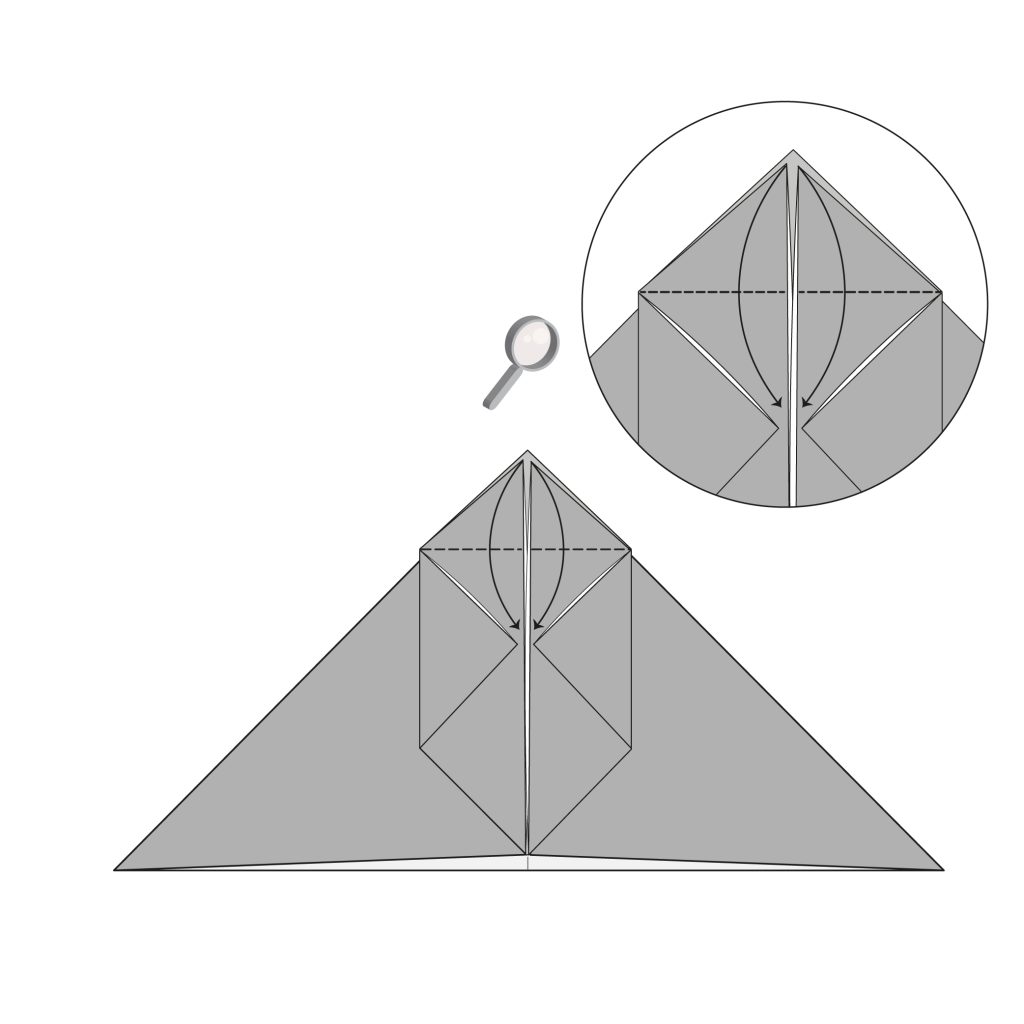
Step 5

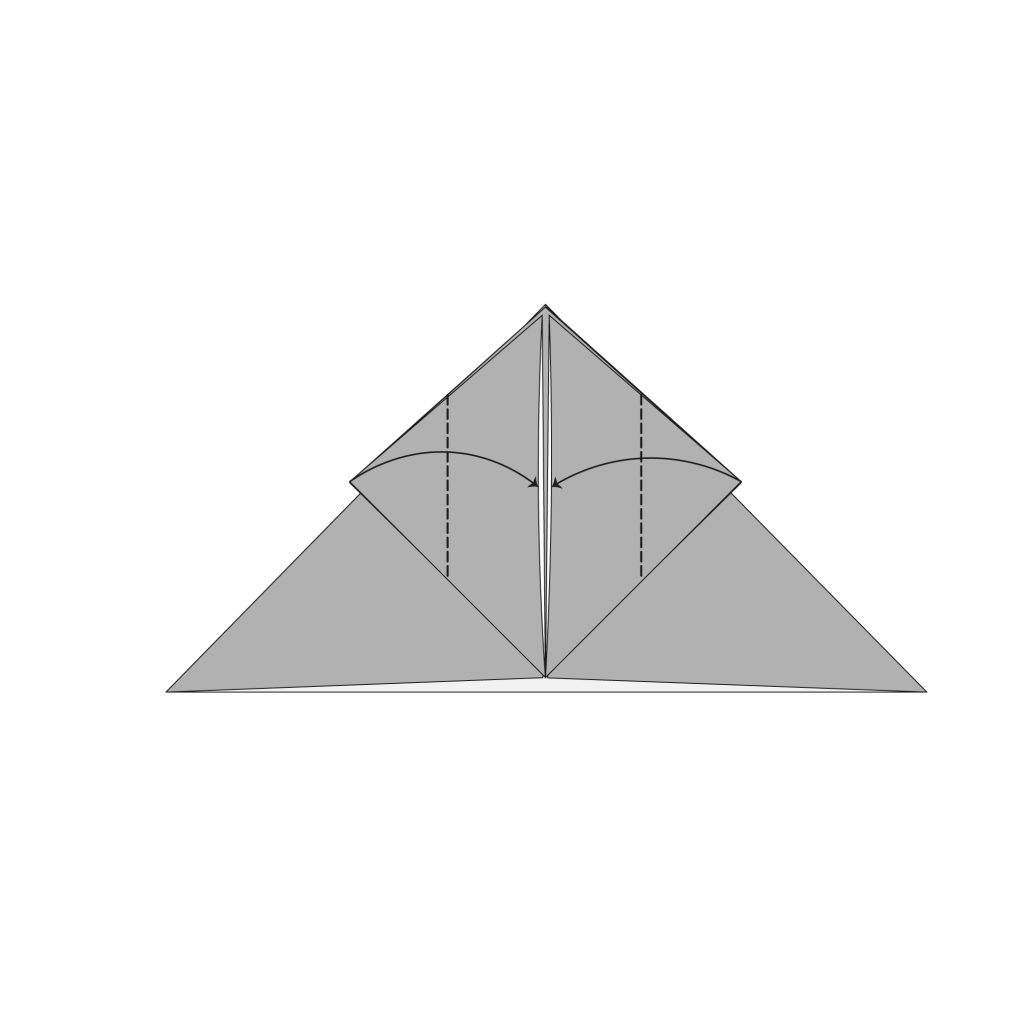
Fold the left and right corners of the top flaps to the central line.
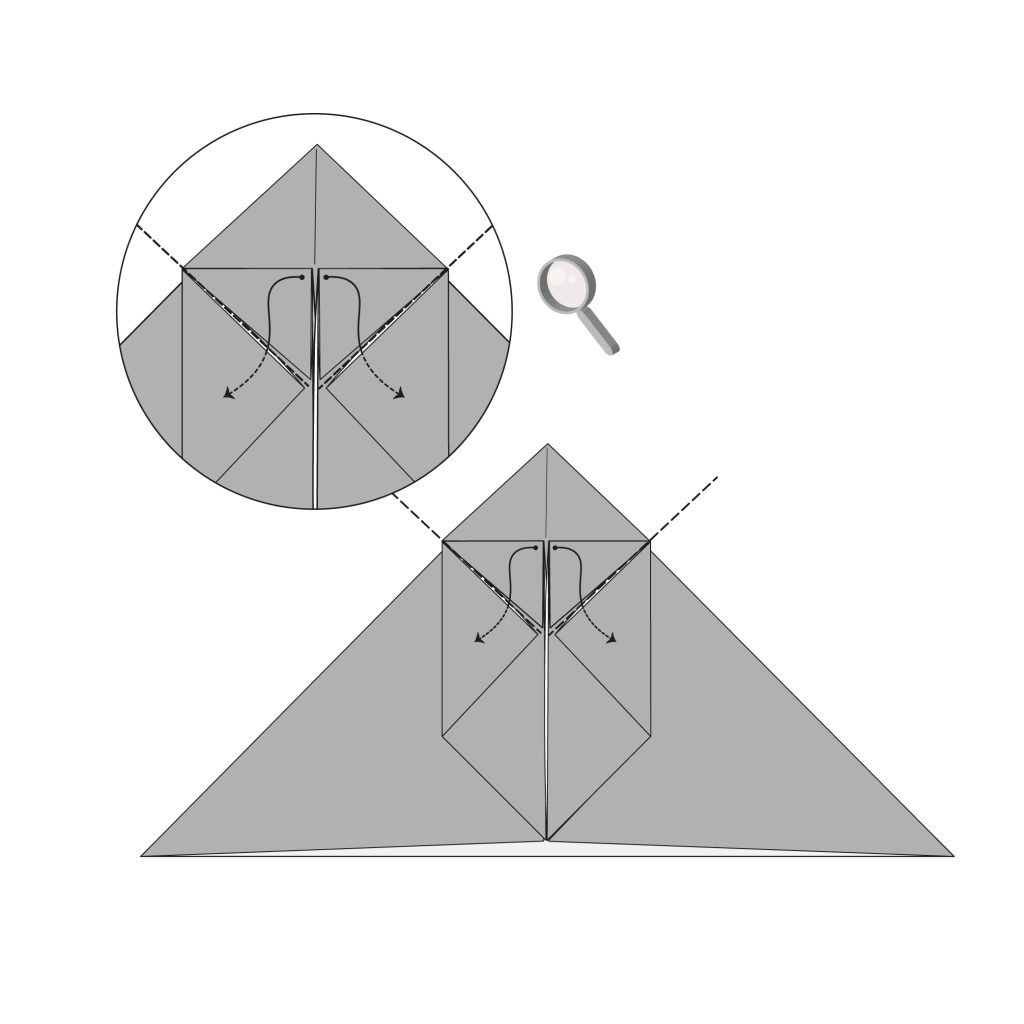
Step 6
Bring the top flaps’ corners down and fold along the dotted lines.
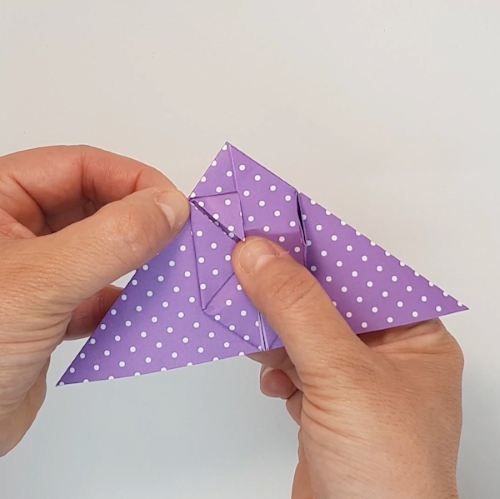
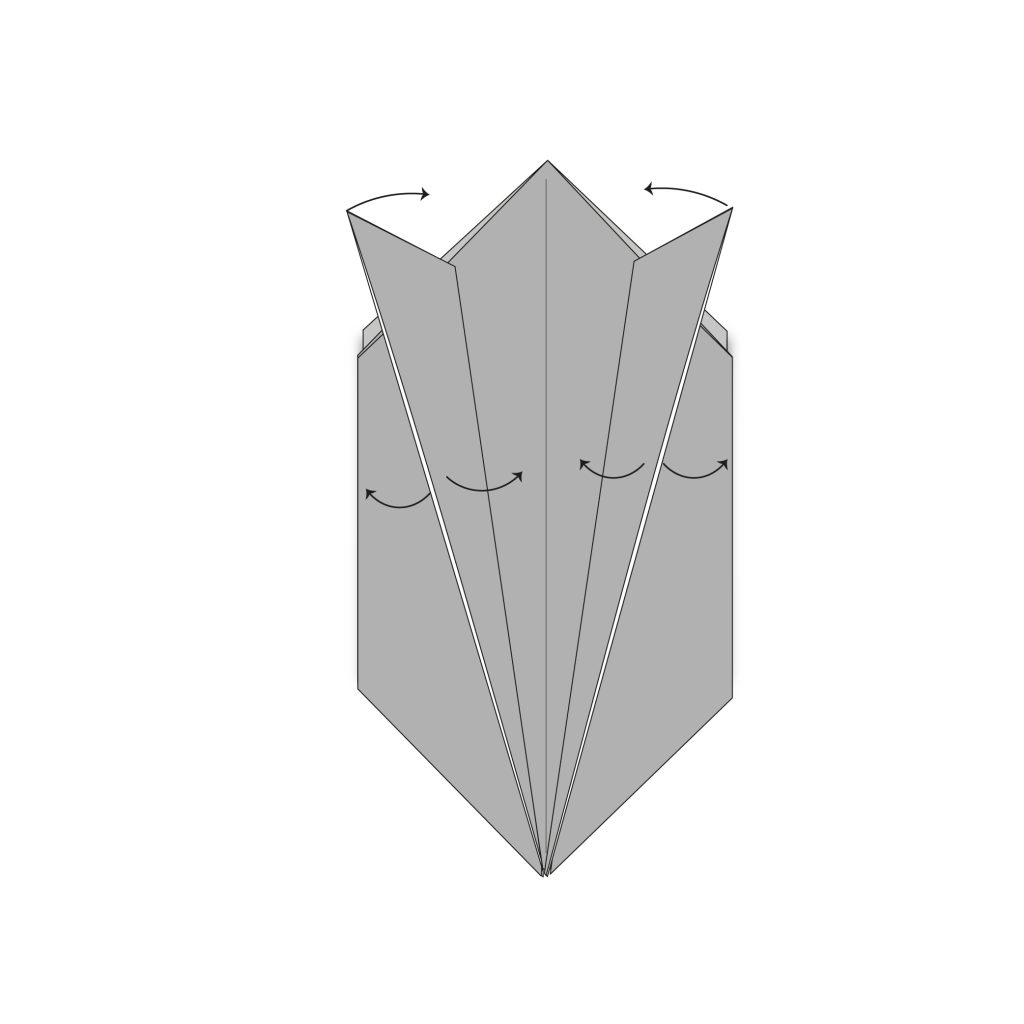
Step 7
Tuck the flaps you created in Step 6 into the pockets on both sides. Crease them well once they’re all tucked in.
Step 8
Turn the model over. Then bring the bottom corners up and fold to the central line.
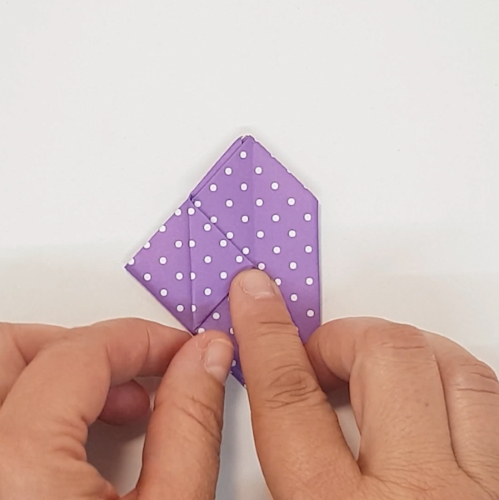
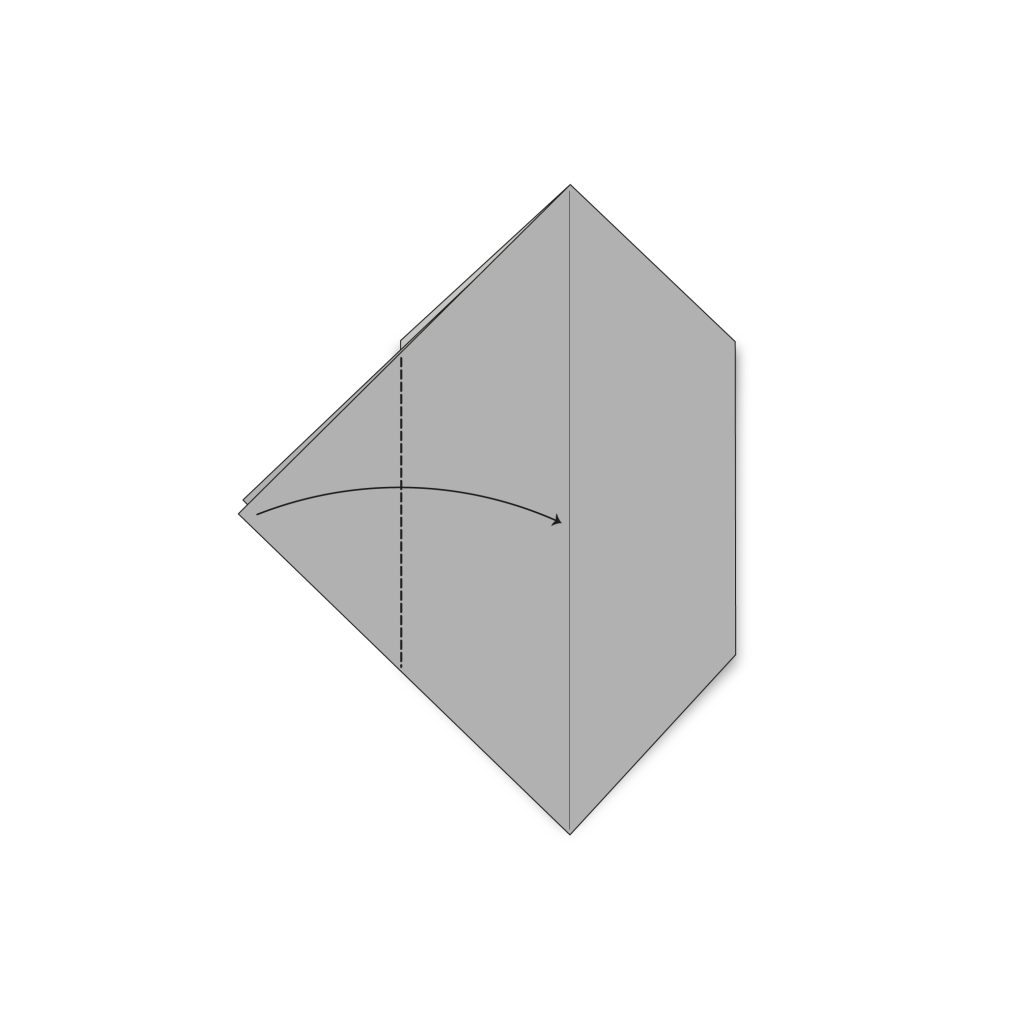
Step 9

Fold the right top flap to the left.
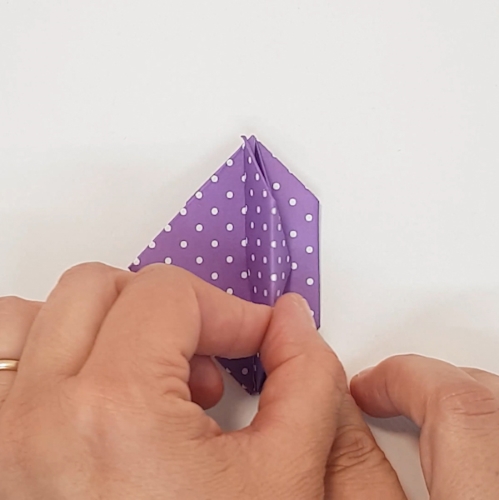
Step 10
Fold the left corner of the top flap to the central line.
Step 11
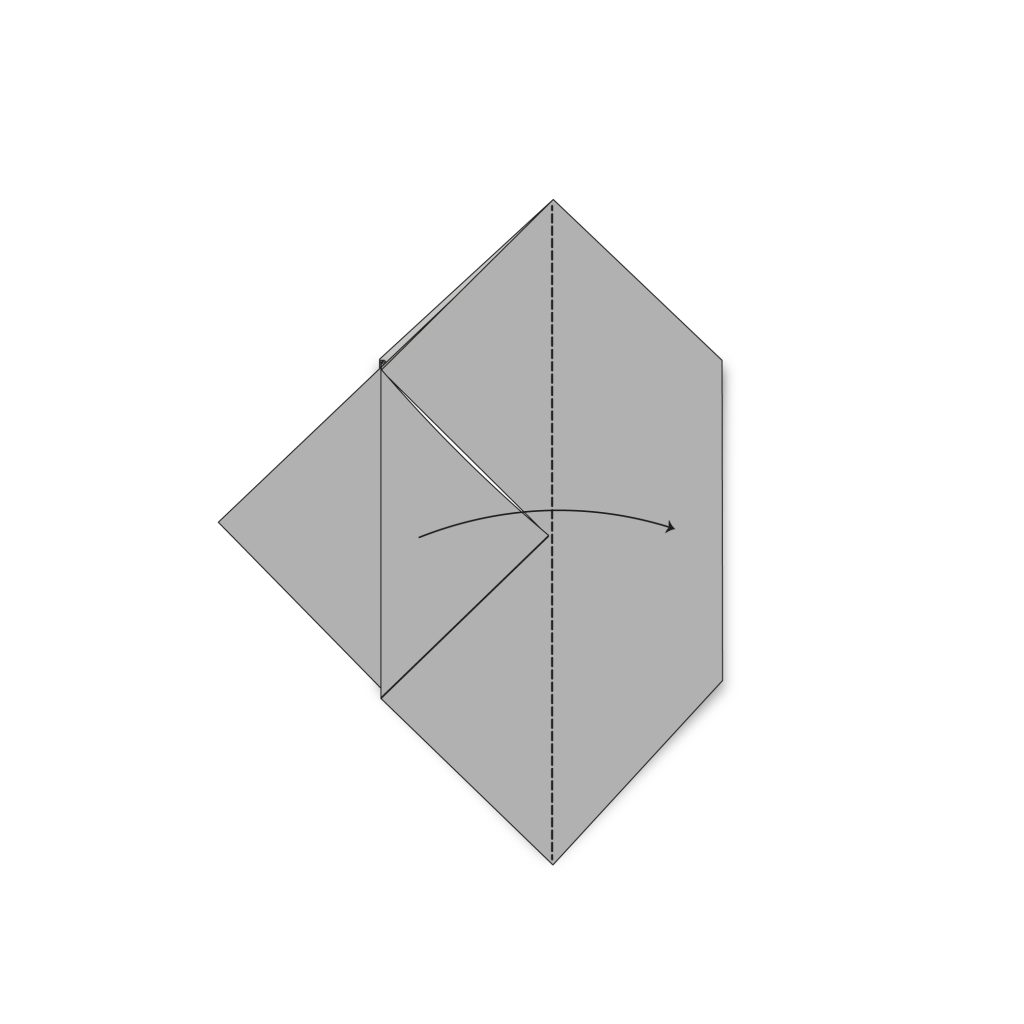
Fold the left top flap to the right.
Step 12

Repeat Steps 10 to 12 on the opposite side, mirroring the directions.
Step 13
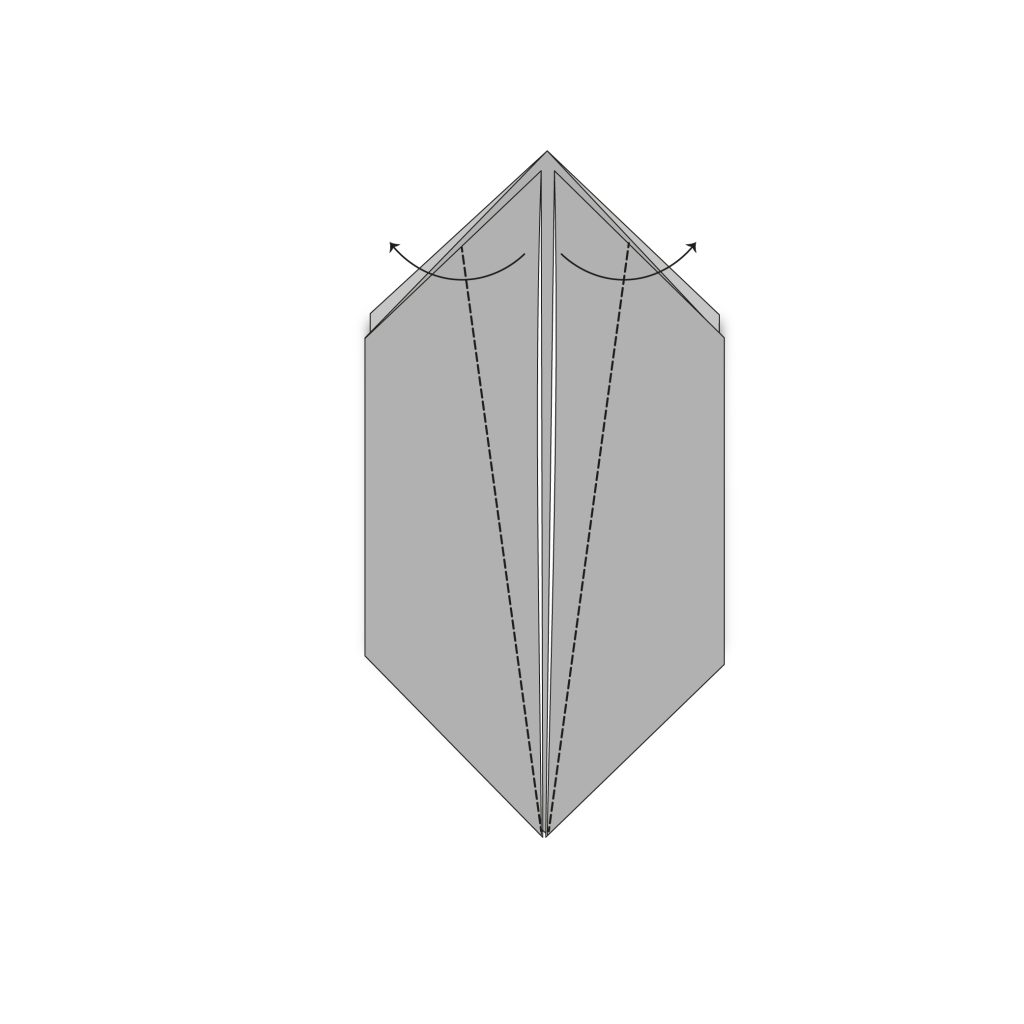
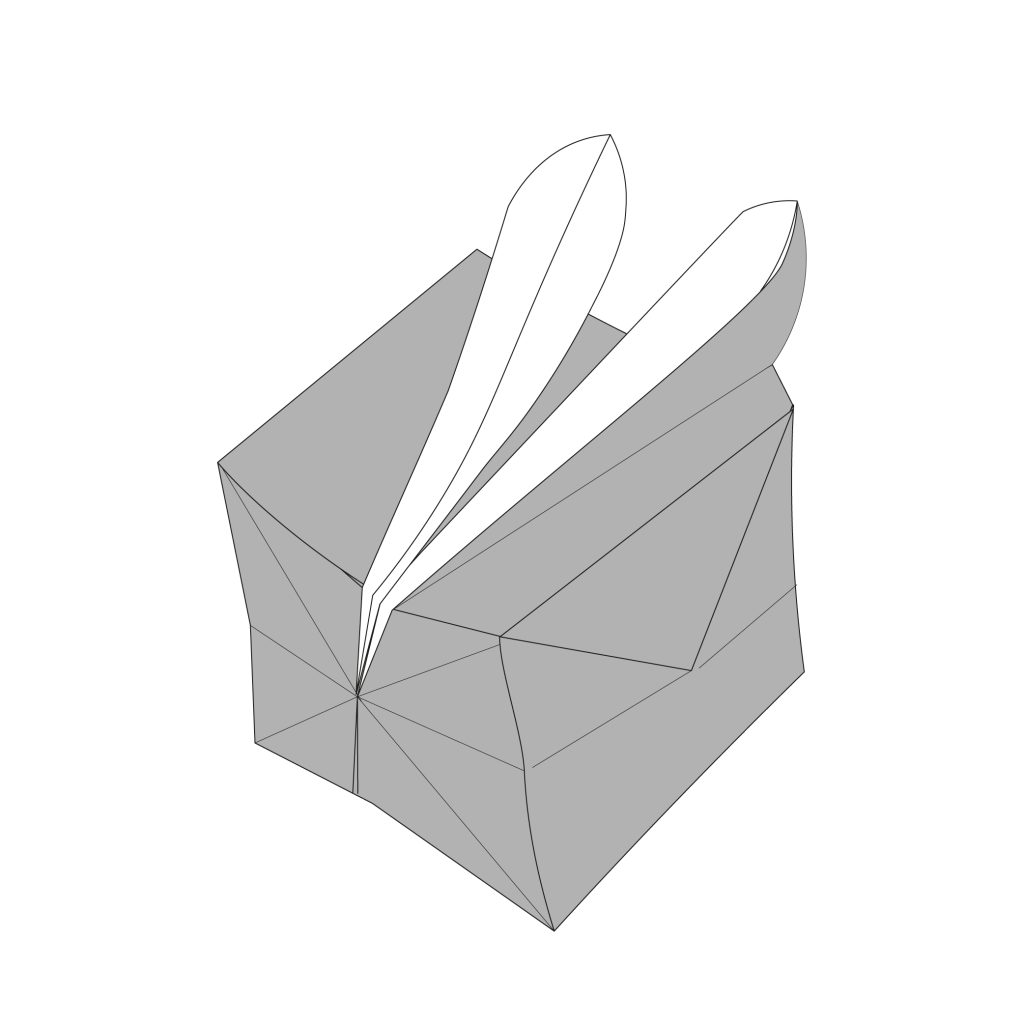
Fold the top corners of the top layers as shown on the diagram.
 Folding tip: Feel free to play around with the angle of these folds to create different designs for the rabbit ears, whether you want them to be thinner or larger.
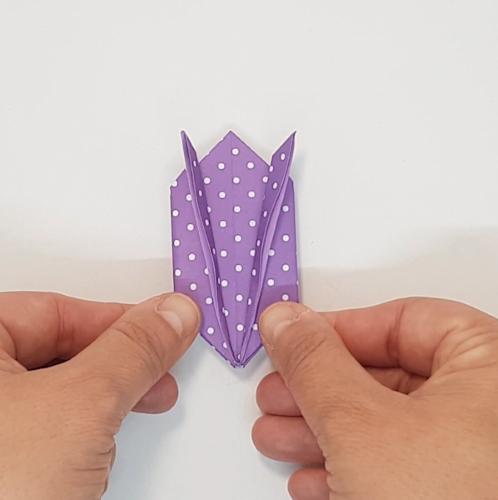
Step 14

Open the flaps created in the previous step to give them their final rabbit ear shapes.
Step 15
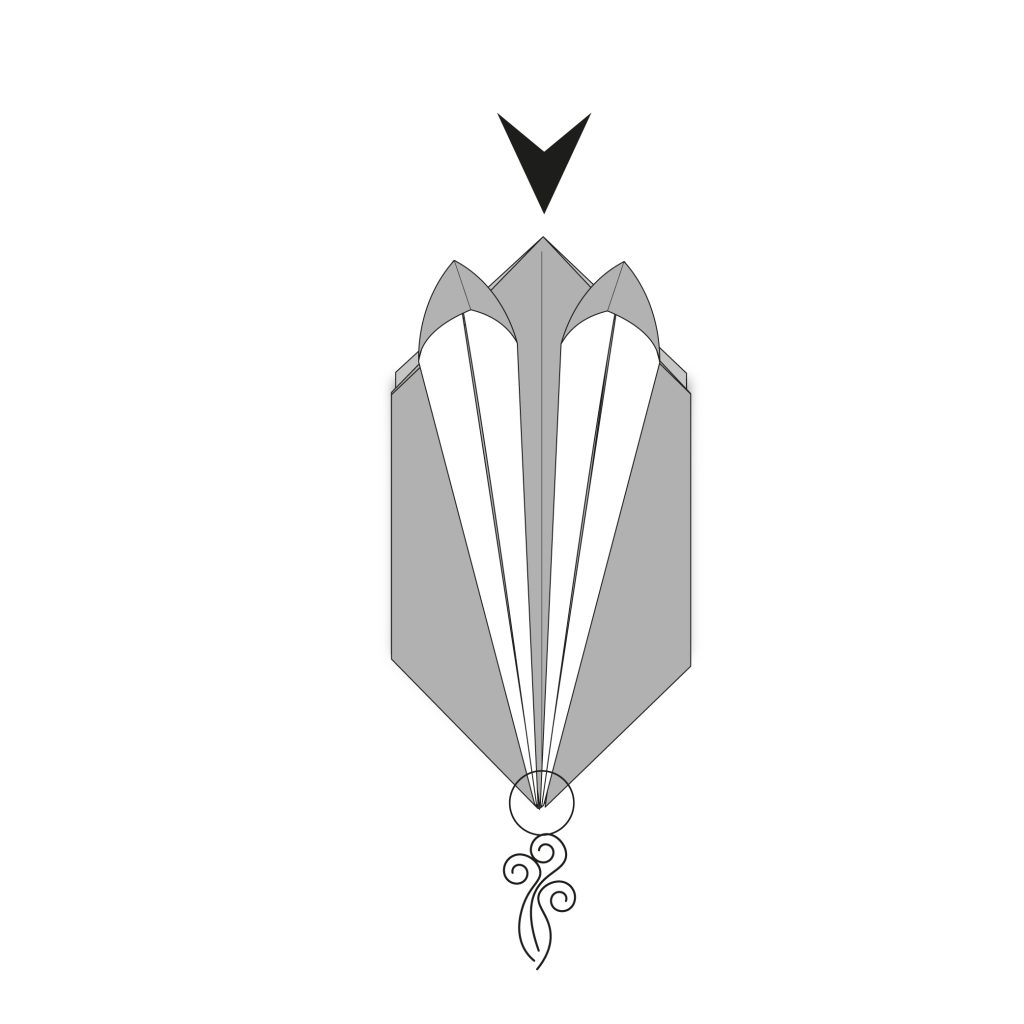
While gently pushing the top corner of the model with one finger, blow air into the bottom hole to inflate the model into a balloon shape.
Side note: For the video, we shaped the model by pushing the opposite corners. But you might find it easier and more fun to inflate the model instead.
The Completed Origami Balloon Rabbit
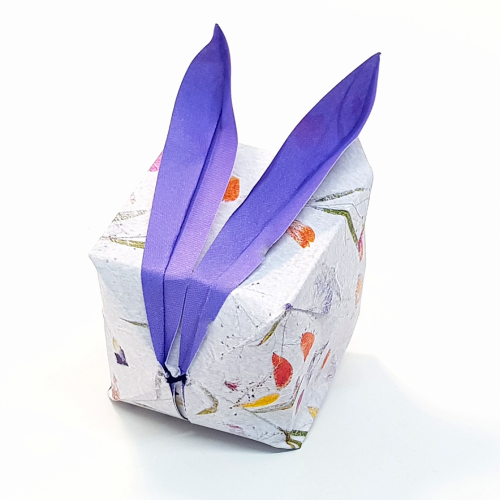
You can draw eyes and whiskers on the model to give it some extra charm!
Congratulations on folding this origami balloon rabbit!
You can have fun experimenting with different paper patterns and start folding with the white side of the paper facing up. Your chosen color or pattern will then only show on the inside of the rabbit ears, which is also really lovely.
Feel free to share your creations with us in the comments or on socials!
The post How to Fold a Traditional Origami Balloon Rabbit appeared first on Origami.me.