Materials Needed
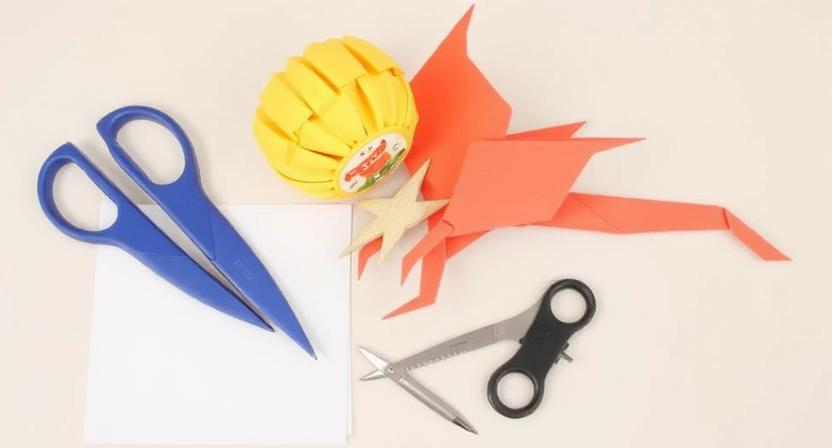
When embarking on the journey of creating a 3D origami dragon, there are a few essential materials that you will need to have on hand. Firstly, ensure you have a pack of origami paper in various colors to bring your dragon to life. It’s recommended to use paper specifically designed for origami to ensure smooth folding and crisp edges. Additionally, having a pair of sharp scissors, a glue stick or craft glue, and a ruler will aid in creating precise and clean folds for your dragon masterpiece. Lastly, gather some small tweezers to help with intricate detailing and precise adjustments as you assemble your dragon.
In addition to the basic materials, having a clear workspace with good lighting and a flat surface will provide an optimal setting for crafting your origami dragon. While not mandatory, having a cutting mat or surface protector to prevent any damage to your workspace is also beneficial. Keep these materials organized and within reach to enjoy a seamless and focused origami crafting experience.
Selecting Paper for Origami
When it comes to origami, the choice of paper plays a crucial role in the final result of your creation. Selecting the right paper for your origami project can greatly impact the ease of folding and the overall appearance of your design. It is essential to choose a paper that is thin yet durable, as thicker paper can be difficult to fold neatly.
Origami paper, also known as kami, is a popular choice for beginners due to its lightweight and easy-to-fold nature. However, for more intricate designs like the 3D origami dragon, you may want to opt for a slightly thicker paper to add sturdiness to the final model. Experimenting with different types of paper, such as rice paper or tissue foil, can also add a unique texture and finish to your origami creations.
Preparing the Paper for Folding
When beginning an origami project, selecting the right paper is essential for a successful outcome. The paper you choose should be thin and flexible, yet sturdy enough to hold its shape. Traditional origami paper, also known as kami, is a popular choice due to its lightweight texture and versatility in folding. However, other options such as tissue paper, rice paper, or even wrapping paper can also be used for different effects. Experimenting with various types of paper can add creativity and uniqueness to your origami creations.
Before diving into the folds and creases of your origami design, it is important to ensure that your paper is properly prepped for folding. To prevent tears and wrinkles in your finished piece, take the time to smooth out any wrinkles or creases in the paper. Using a bone folder or the edge of a ruler can help create crisp, clean folds. Additionally, trimming the paper to the desired size and shape before starting your project can make the folding process smoother and more precise. By taking these simple steps to prepare your paper, you’ll set yourself up for a more enjoyable and successful origami experience.
• Select the right paper for your origami project
• Traditional origami paper (kami) is a popular choice
• Experiment with different types of paper for unique effects
Before starting to fold:
• Smooth out any wrinkles or creases in the paper
• Use a bone folder or ruler for clean folds
• Trim the paper to desired size and shape
By properly preparing your paper:
• Prevent tears and wrinkles in finished piece
• Make folding process smoother and more precise
• Set yourself up for an enjoyable and successful origami experience
Basic Origami Folds to Master
Origami, the traditional Japanese art of paper folding, involves mastering a few basic folds that serve as the foundation for creating intricate designs. The first fold to learn is the valley fold, where you fold the paper towards yourself to create a sharp crease. This fold is often used to create right angles and precise corners in origami models.
Next, the mountain fold involves folding the paper away from you to create a raised ridge or peak. Mastering this fold is essential for adding dimension and structure to your origami creations. Incorporating both valley and mountain folds allows you to create a variety of shapes and forms in your origami models, providing a solid framework for more complex designs.
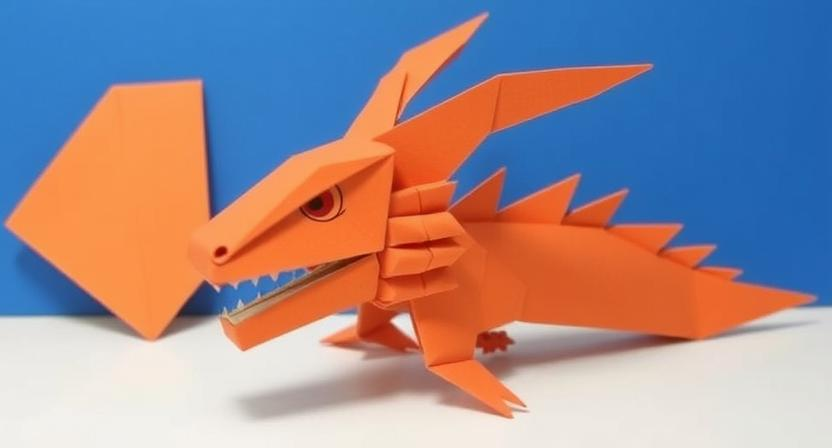
Creating the Dragon’s Body
To create the body of your 3D origami dragon, begin by folding a square piece of paper into a bird base. This base will serve as the foundation for shaping the dragon’s body. Next, fold the top corners of the bird base downwards to create the dragon’s neck. Then, bring the sides of the bird base together by folding in the edges to form the body’s sides. Make sure to crease each fold well to ensure a neat and sturdy structure for your dragon.
Once the basic body shape is formed, take some time to adjust the folds to achieve the desired proportions and contours. You can gently curve the body to give it a more dynamic and lifelike appearance. Pay attention to the details, such as the placement of the neck in relation to the body and the overall alignment of the folds. This step is crucial in laying the groundwork for the rest of your origami dragon’s features and ensuring a cohesive and visually appealing final result.
Constructing the Dragon’s Head
To create the dragon’s head, start with a square piece of paper. Fold the paper in half diagonally to form a triangle, then unfold it. Next, fold the top corner of the triangle down towards the center fold to create a smaller triangle at the top. Fold the edges of the smaller triangle towards the center, leaving a small gap at the top to represent the dragon’s snout.
After establishing the shape of the snout, fold the bottom corners of the triangle upwards to create the dragon’s jaw. Then, fold the top section of the paper down to cover the raw edges of the jaw folds. This will give the dragon’s head a more refined and realistic appearance. Lastly, use your fingers to shape and mold the paper to bring out the desired features of the dragon’s head, such as pointed horns or fierce eyes.
Adding Details to the Dragon’s Face
After shaping the basic structure of the dragon’s face, it’s time to add details to bring it to life. Start by creating eyes for the dragon using smaller pieces of paper in contrasting colors. Placing the eyes slightly above the center of the face can give the dragon a fierce or intense look. Experiment with different shapes and sizes to achieve the desired expression for your dragon.
Once the eyes are in place, consider adding nostrils to the dragon’s snout for added realism. Small triangular folds or tiny circular shapes can work well for this purpose. Be mindful of the placement of the nostrils to maintain symmetry and balance in the dragon’s face. Additionally, you can further enhance the dragon’s expression by experimenting with the positioning and shape of the mouth.
Making the Dragon’s Wings
To make the dragon’s wings, begin with a square sheet of paper. Fold the paper in half diagonally, creating a triangle. Then, fold the two bottom corners of the triangle up to the top point, forming a smaller triangle. Next, fold the top point down to create a straight edge along the top of the triangle. After that, fold the wings in half at the center point to create creases for the wings.
Once the initial folds are completed, unfold the paper and carefully refold the wings inward, following the creases made earlier. This will give the wings a more defined shape and add dimension to the dragon’s body. Make sure to adjust the angle and position of the wings to achieve the desired look for your 3D origami dragon.
Attaching the Wings to the Body
To attach the wings to the body of your 3D origami dragon, carefully position the wings where you want them to sit on the dragon’s back. Ensure that the placement is symmetrical and aligned with the body to maintain balance and proportion. Once you are satisfied with the position, use a small amount of craft glue to secure the wings in place. Press down gently to adhere the wings firmly to the body, taking care not to displace them from the desired location.
After attaching the wings, allow the glue to dry completely before proceeding with any further steps. This will ensure that the wings are securely attached to the body and will not shift or detach during the final stages of assembling your 3D origami dragon. Remember to handle the dragon with care as you continue constructing it to avoid any accidental damage to the wings or other delicate parts of the design.
Forming the Dragon’s Tail
To form the dragon’s tail, start by taking a square piece of paper and folding it in half diagonally to create a triangle. Next, fold the top layer of the triangle down towards the bottom edge, leaving a small gap at the tip. Flip the paper over and fold the two bottom corners towards the center crease, creating a diamond shape.
After making these initial folds, unfold the paper slightly to reveal the creases made in the previous steps. Fold the left and right sides of the diamond towards the center crease, then fold the entire piece in half along the center crease. Finally, tuck the excess paper inside the folded piece to form the intricate and detailed tail of the origami dragon. Remember to make precise and crisp folds to achieve a polished and professional-looking result.
Crafting the Dragon’s Legs
For the legs of the origami dragon, we will be creating two symmetrical pieces to support the body and give the dragon a balanced stance. Start with a square piece of paper, ensuring it complements the color scheme of your dragon. Begin with a valley fold to divide the paper in half, then unfold and repeat to create a crease that will guide your next folds. Bring the top corners down to meet the center crease, forming a triangle shape. Fold the bottom edge of the triangle up to create the leg’s base, then fold the sides inward to refine the shape. Repeat these steps to craft the second leg, ensuring consistency in size and structure.
To add dimension and stability to the legs, make small inward folds at the tip to create the feet of the dragon. These folds will give the illusion of claws or paws, depending on the style of your dragon. Adjust the angles and positioning of the feet to achieve the desired look and ensure they are proportionate to the body. Once both legs are finalized, position them at the base of the dragon’s body, securing them in place with gentle pressure. The legs should support the weight of the dragon and contribute to its overall posture, enhancing the aesthetic appeal of your 3D origami creation.
Assembling the Different Parts Together
After completing all the individual components of the 3D origami dragon, it is time to bring them together in a cohesive manner. Start by carefully laying out each part in front of you in an organized fashion. This step will help you visualize how the dragon will come together and where each element should be placed for the final assembly.
Next, begin attaching the various parts starting from the body and working your way outwards to the head, wings, tail, legs, and other details. Use a small amount of glue or tape to secure the pieces together, ensuring that they are aligned correctly and securely attached. Take your time during this process to ensure a seamless assembly of the different components of the 3D origami dragon.
Adjusting the Dragon’s Shape
To ensure that your 3D origami dragon looks its best, adjusting the shape is a crucial step. Sometimes, certain folds may need to be tightened or loosened to achieve the desired look. Pay close attention to the overall proportions of the dragon and make any necessary adjustments to make it more visually appealing.
Remember that the process of adjusting the dragon’s shape is iterative. Take your time to assess the different parts of the dragon and refine the folds as needed. Small tweaks can make a big difference in the final appearance of your origami creation.
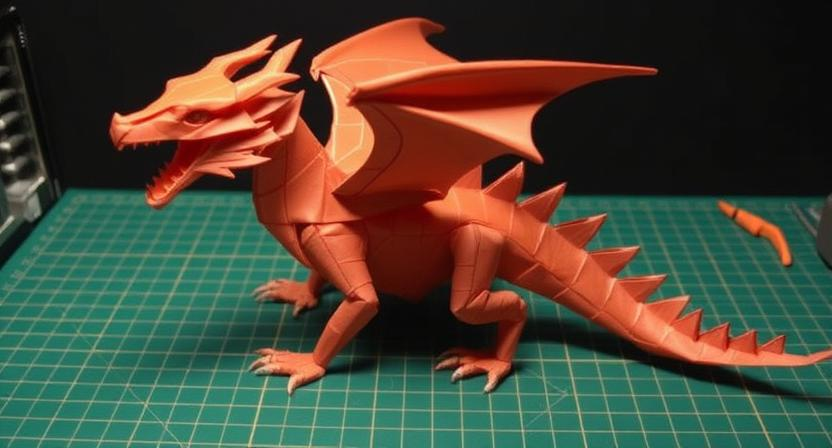
Enhancing the Dragon’s Features
To give your origami dragon a more lifelike appearance, consider enhancing its features using various techniques. Adding texture to the dragon’s scales can create depth and interest. You can achieve this by gently creasing or curling the edges of the individual scales for a more realistic effect.
In addition, incorporating more intricate details such as spikes along the dragon’s spine or claws on its feet can elevate the overall look of your creation. These small additions can make a big difference in capturing the essence of a majestic mythical creature. Experiment with different techniques and be patient as you refine the features of your origami dragon to bring it to life.
Choosing Color Schemes for the Dragon
When selecting color schemes for your origami dragon, consider the symbolism associated with different colors. Traditional colors like red symbolize power and good fortune, while gold represents wealth and prosperity. Green can signify growth and harmony, while black can evoke mystery and strength. Experiment with various combinations to find a color scheme that resonates with the intended character of your dragon.
Another approach is to draw inspiration from nature. Look to the vibrant colors of birds, reptiles, or mythical creatures for ideas on how to incorporate a realistic or fantastical color scheme into your origami dragon. Observing the color patterns in the world around you can spark creativity and help you create a visually striking and unique dragon design that reflects your artistic vision.
Adding Decorative Elements
Transforming your 3D origami dragon into a work of art can be achieved through adding decorative elements. Consider incorporating small beads, sequins, or rhinestones to embellish the dragon’s body and wings. These delicate additions can add depth and texture to your creation, enhancing its overall appearance.
Another way to elevate the visual appeal of your origami dragon is by using metallic or glitter pens to draw intricate patterns or scales on its body. Experiment with different designs and techniques to create a unique and eye-catching look. Additionally, adding a touch of metallic or iridescent paint to certain areas of the dragon can make it shimmer and stand out, giving it a magical and captivating aura.
Final Touches for a Polished Look
After all the intricate folding and assembling, it’s time to give your 3D origami dragon those final touches to make it truly stand out. One aspect to focus on is refining the edges and creases of the dragon’s features to give it a more polished appearance. Smooth out any rough edges with your fingers and ensure all folds are neat and crisp for a clean finish.
Next, consider adding some embellishments to enhance the overall look of your origami creation. You can use small details like scales, claws, or even facial expressions to bring your dragon to life. Be creative with how you incorporate these extra features, making sure they complement the design of your dragon and add an extra layer of detail to make it truly eye-catching.
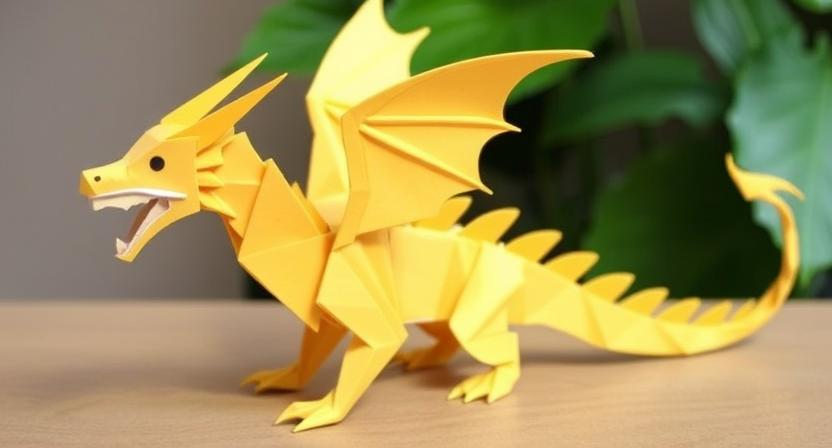
Displaying Your 3D Origami Dragon
Once your 3D origami dragon is completed, you’ll want to display it proudly to showcase your artistic creation. Consider placing your dragon on a clean, flat surface where it can be admired from different angles. A spot with good lighting can enhance the intricate folds and details of your origami masterpiece. Positioning your dragon on a contrasting background can make it stand out even more, whether against a dark backdrop to highlight lighter colors or against a light surface to showcase darker hues.
To add a dynamic element to your display, you can carefully adjust the positioning of the dragon’s limbs, wings, and tail. Experiment with different poses to bring your dragon to life and evoke a sense of movement. Additionally, incorporating props such as miniature trees, rocks, or even other origami creatures can create a captivating scene for your dragon to inhabit. Remember, the way you choose to display your 3D origami dragon is a reflection of your creativity and craftsmanship, so take your time to arrange it in a way that truly showcases the beauty and complexity of your artwork.
Tips for Beginners
For beginners venturing into the world of origami, it is essential to start with simple designs before attempting more complex ones. Practice folding basic shapes like squares, triangles, and rectangles to familiarize yourself with the art of origami. Patience is key as you learn the different folds and techniques required to create intricate designs.
Another crucial tip for beginners is to choose the right type of paper for your origami projects. Start with lightweight paper that is easy to fold and manipulate. As you gain more experience, you can explore using different textures and thicknesses of paper to add depth and detail to your creations. Remember to work in a clean and clutter-free space to avoid unnecessary distractions that may disrupt your focus while folding.
Troubleshooting Common Issues
If you are encountering problems with the folding process, it might be helpful to double-check your creases. Make sure they are crisp and accurate, as any imprecise folds can lead to difficulties in shaping the dragon’s features correctly. Additionally, take your time when completing each fold to ensure precision and smoothness in the final product.
Another common issue that beginners face is the difficulty in attaching the wings securely to the body. If you are struggling with this step, try reinforcing the connection with a small dot of glue or tape. This will help the wings stay in place and maintain the dragon’s overall structure. Also, make sure to press firmly when attaching the wings to ensure a strong bond that will hold up when displaying your 3D origami dragon.