
It’s the perfect time to enjoy a relaxing craft as the temperatures cool down and the autumn leaves begin to fall.
This traditional origami snail is an interesting project that fits the season’s mood, with the soft rain outside and the golden leaves scattered on the ground.
While this paper snail is suitable for beginners, it’s definitely more challenging than other beginner models, like the origami leaf.
The step-by-step instructions will guide you through interesting folds. You’ll be swirling the paper to create the antennas and stretching the paper to make the snail’s shell.
Traditional Origami Snail Step-by-Step Instructions
- Difficulty: Beginner – Level 5
- Folding time: 15 minutes
- Model designer: Traditional
- Paper: Kami 15×15 cm
Step 1
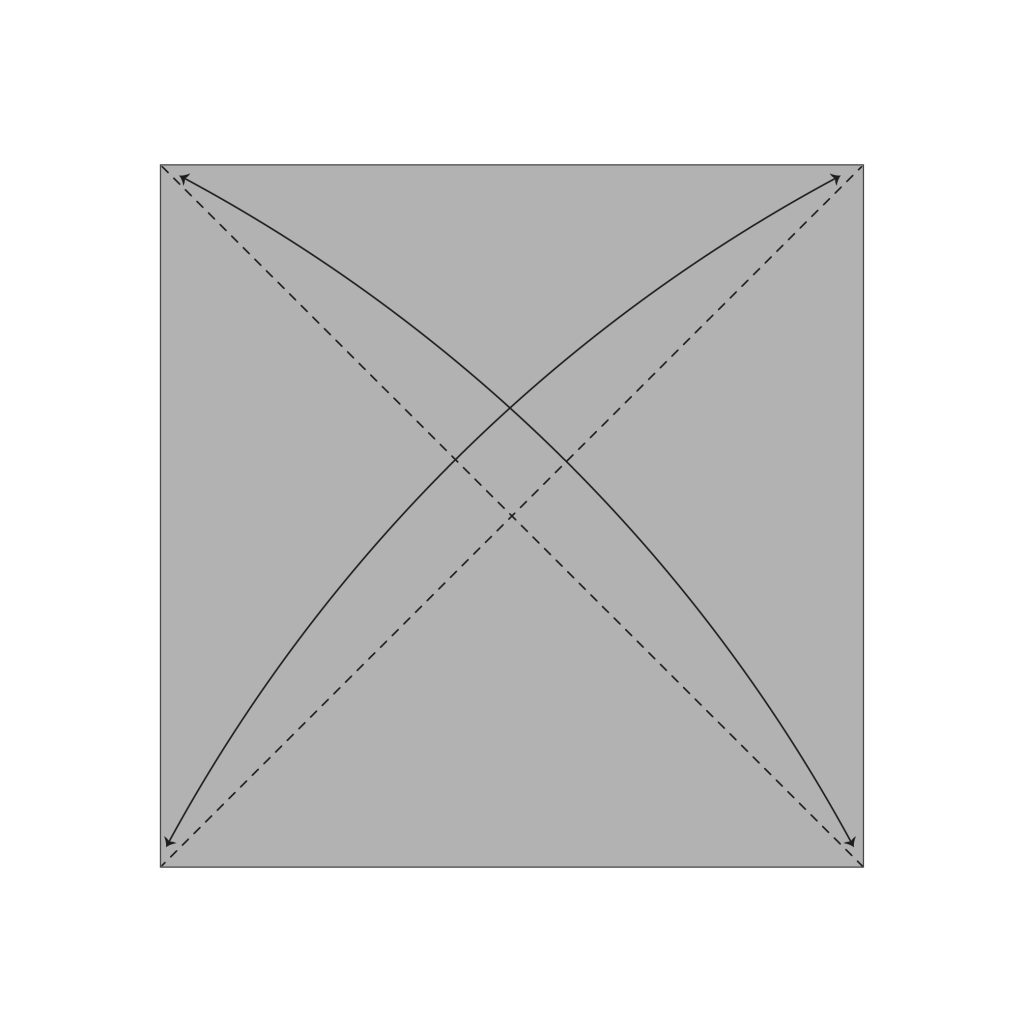
Start with the colored side of the paper facing up. Fold and unfold both diagonals.
Step 2
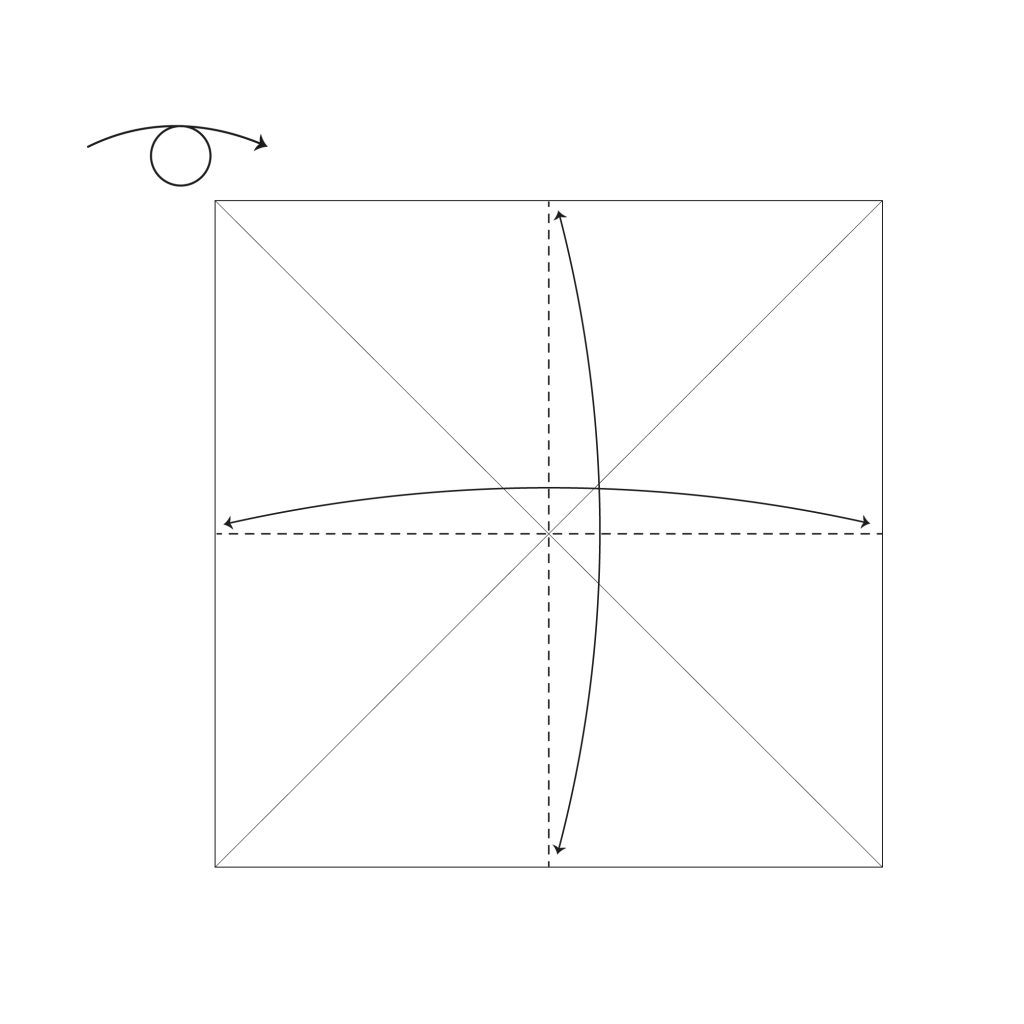
Turn the paper over and fold it horizontally and vertically in half. Then unfold.
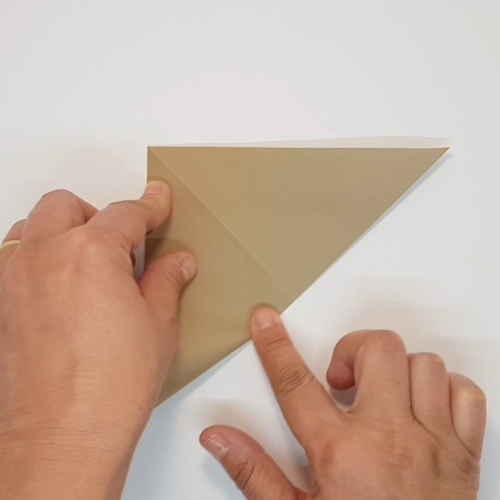
Step 3

Rotate the paper 45 degrees clockwise. Then, fold along the dotted lines using the existing creases to create a square base.
Step 4
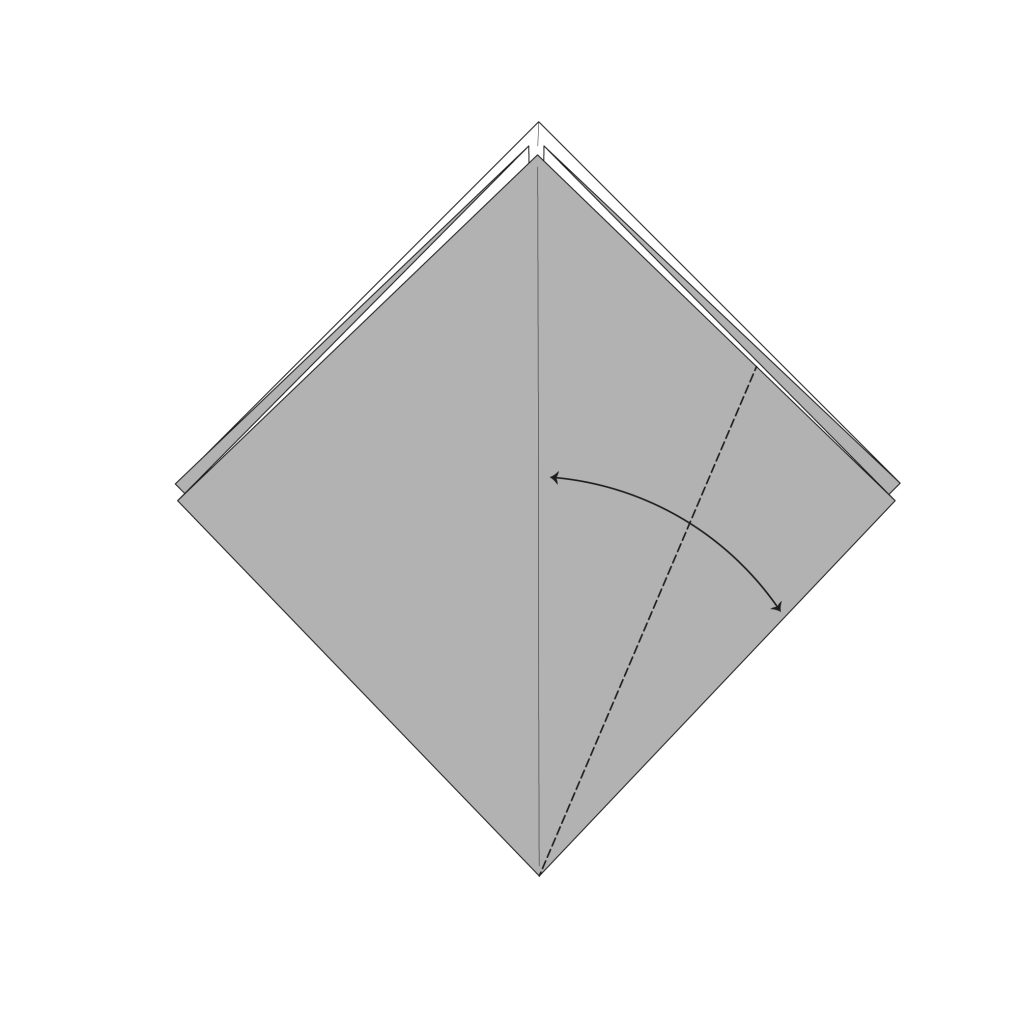
Fold and unfold the right flap to the center line.
 Folding tip: If you’re already familiar with squash folds, you can skip this step.
Step 5
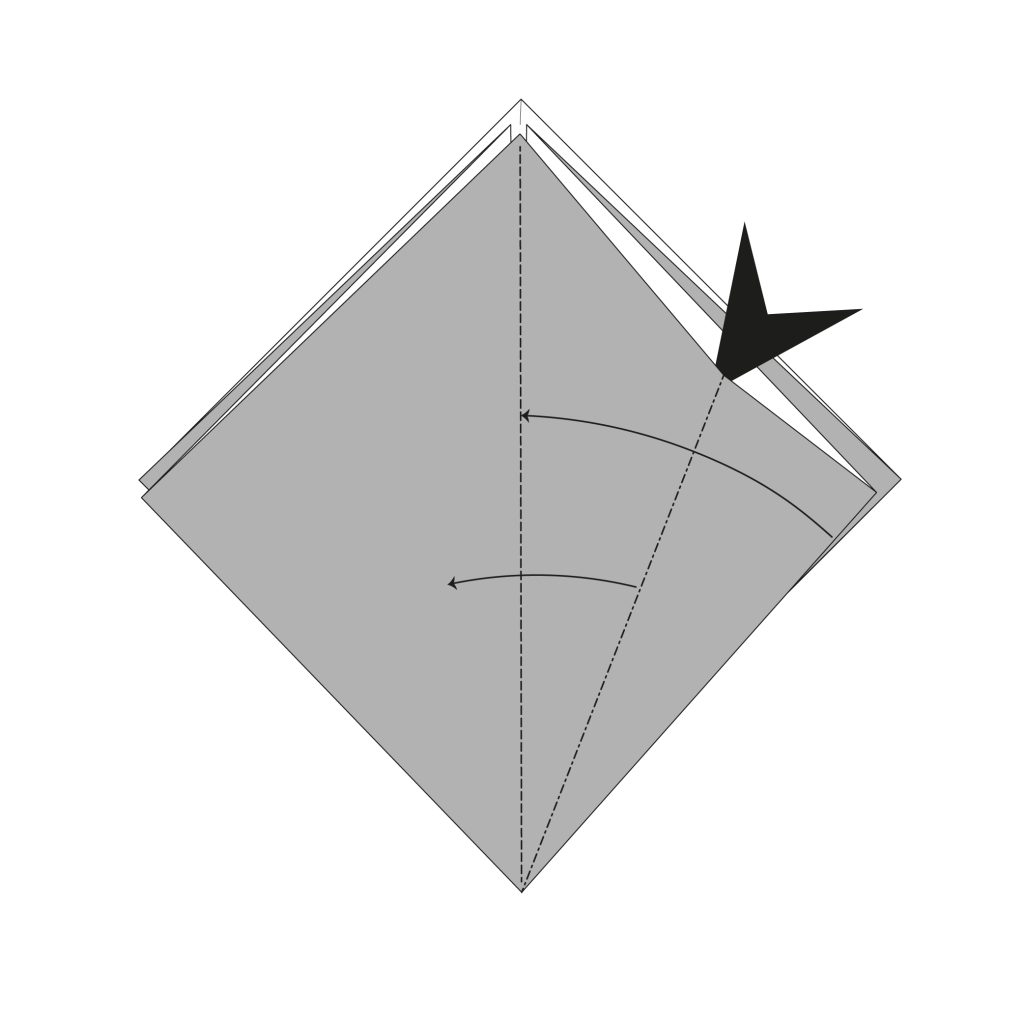
Open the right flap and squash fold using the crease made in Step 4.
Step 6
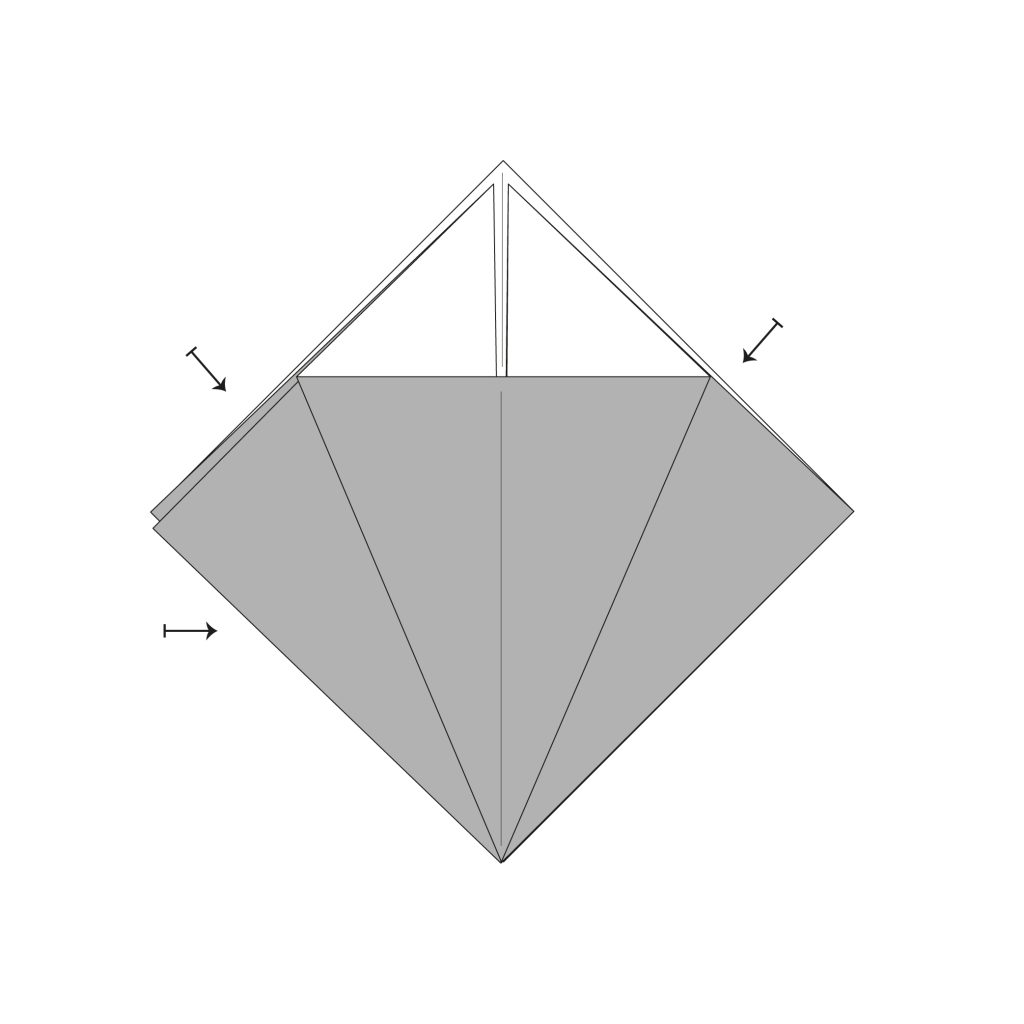
Repeat Steps 4 and 5 three more times on all sides.
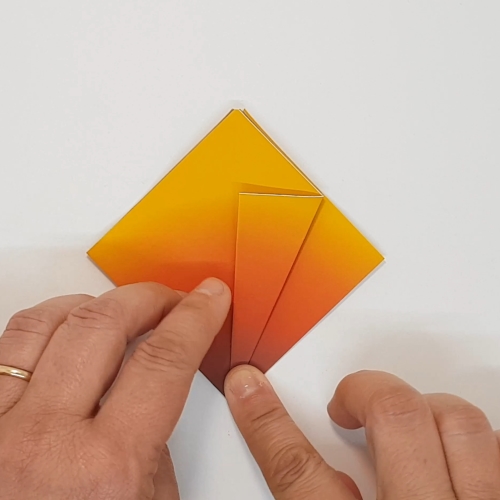
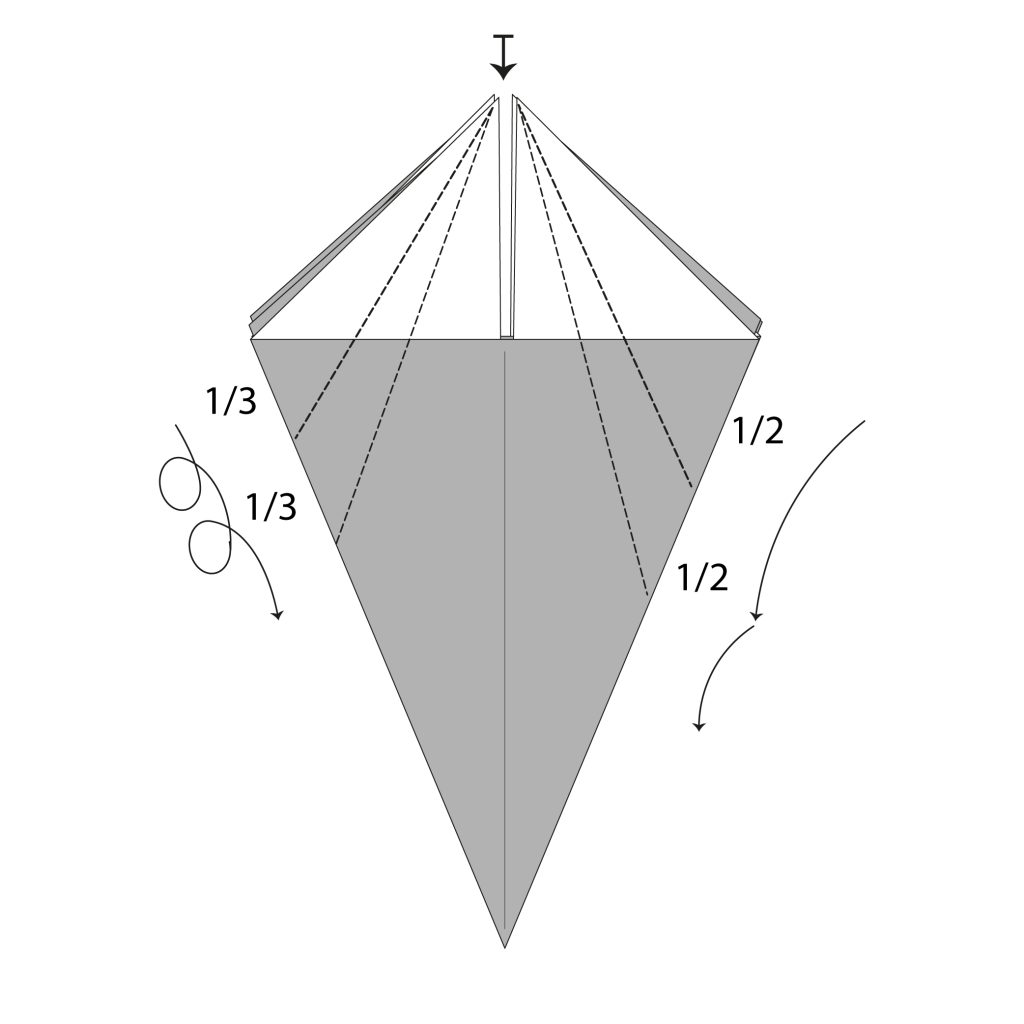
Step 7
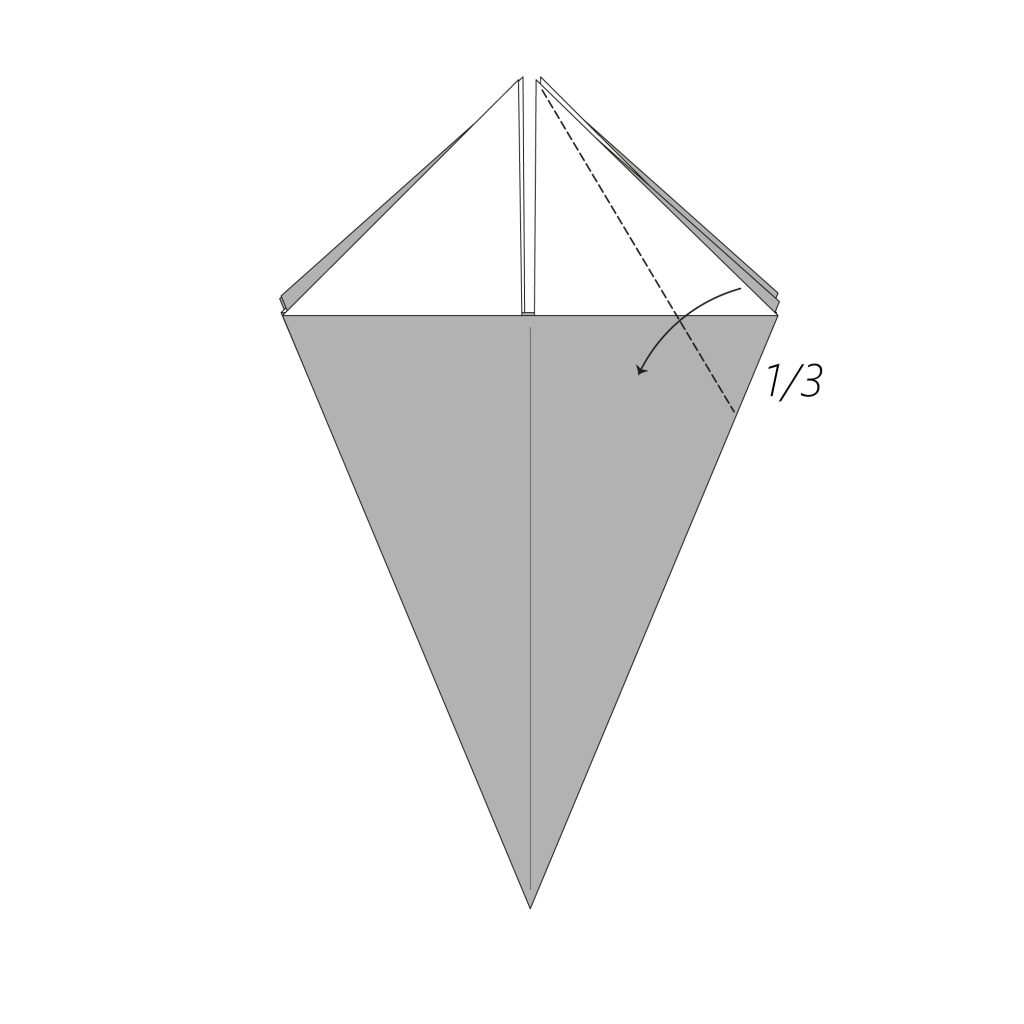
Fold the right flap along the dotted line to create a trisected angle.
Step 8

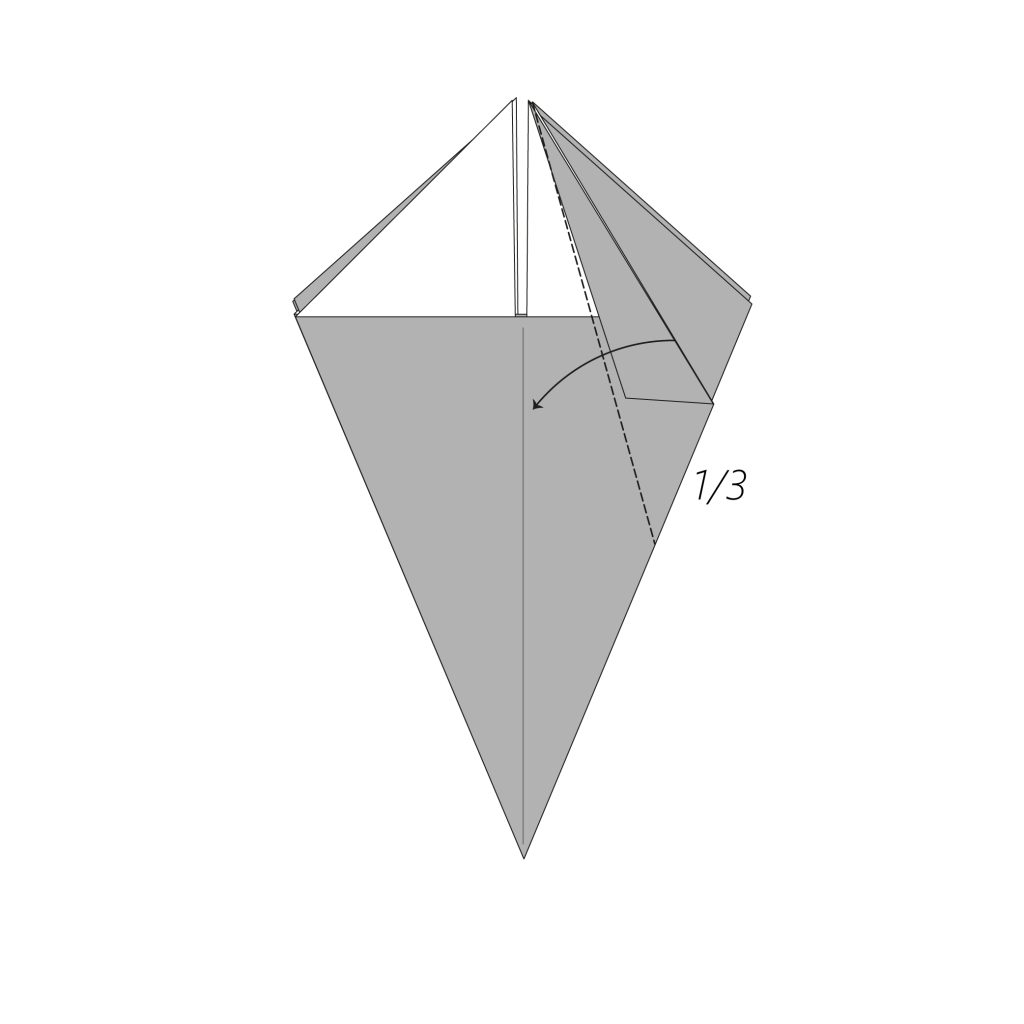
Fold the right flap to the center line.
Step 9
Fold the left flap in half to the center line.
Step 10
Once again, fold the left flap in half to the center line.
Step 11
Turn the model over and repeat Steps 7 to 10.
Step 12
Bring the left center flap to the right and repeat on the other side.
Step 13
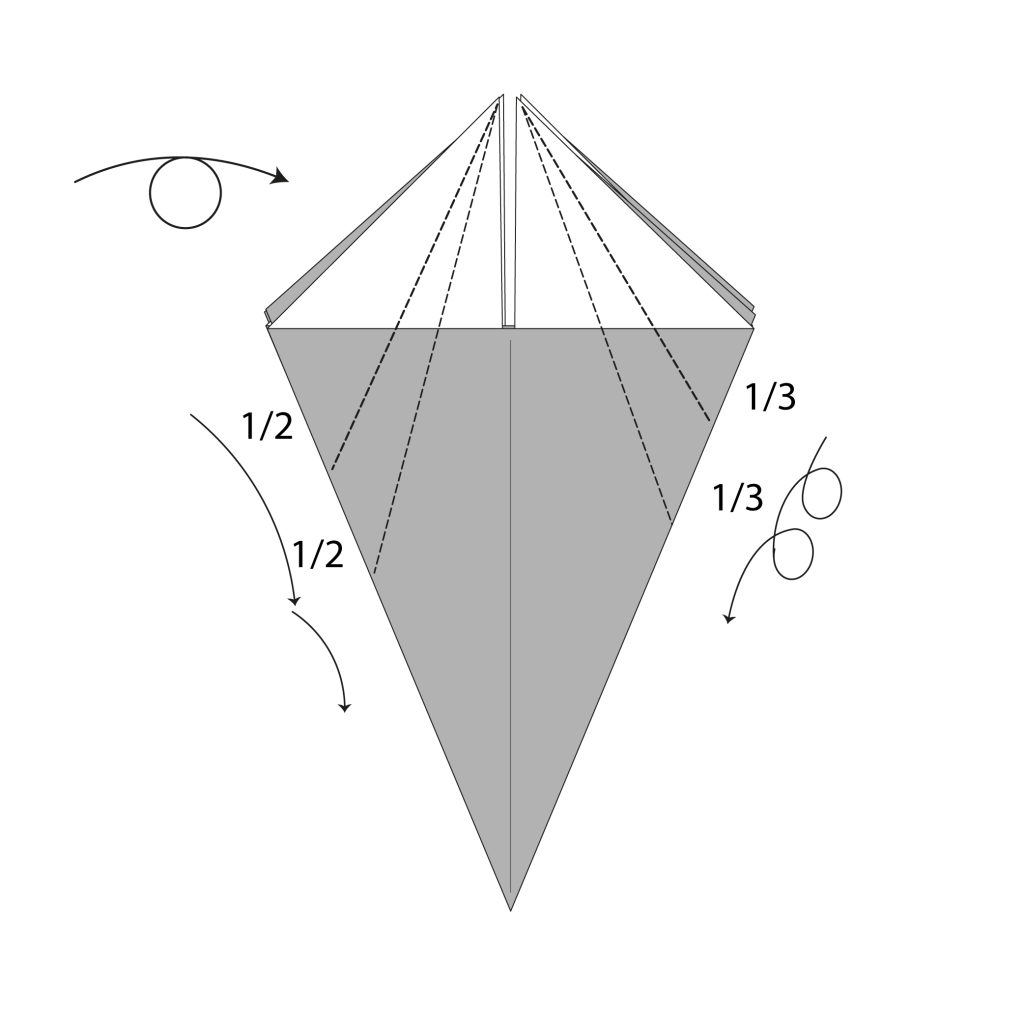
Repeat Steps 7 to 10 on both sides, this time with the trisector angle on the left and the bisector angle on the right.
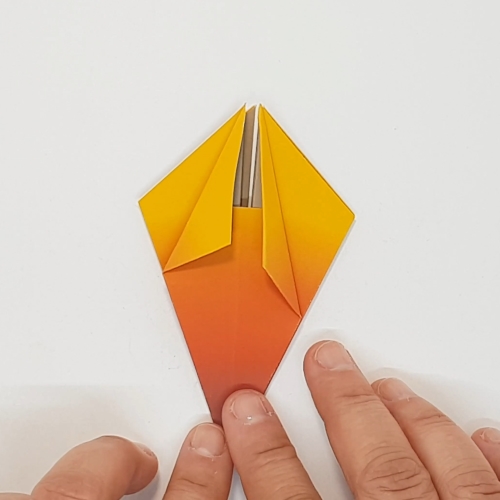
Step 14
Bring the right flap to the left, then repeat on the other side.
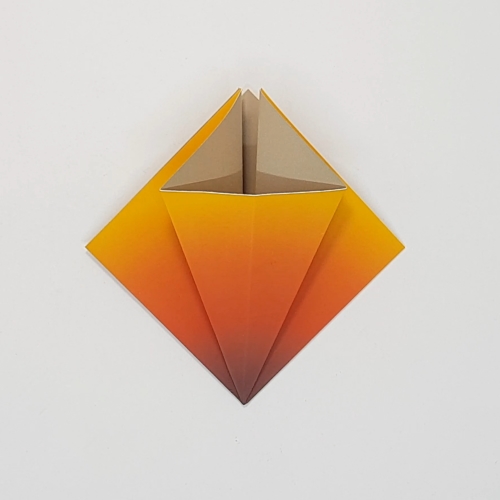
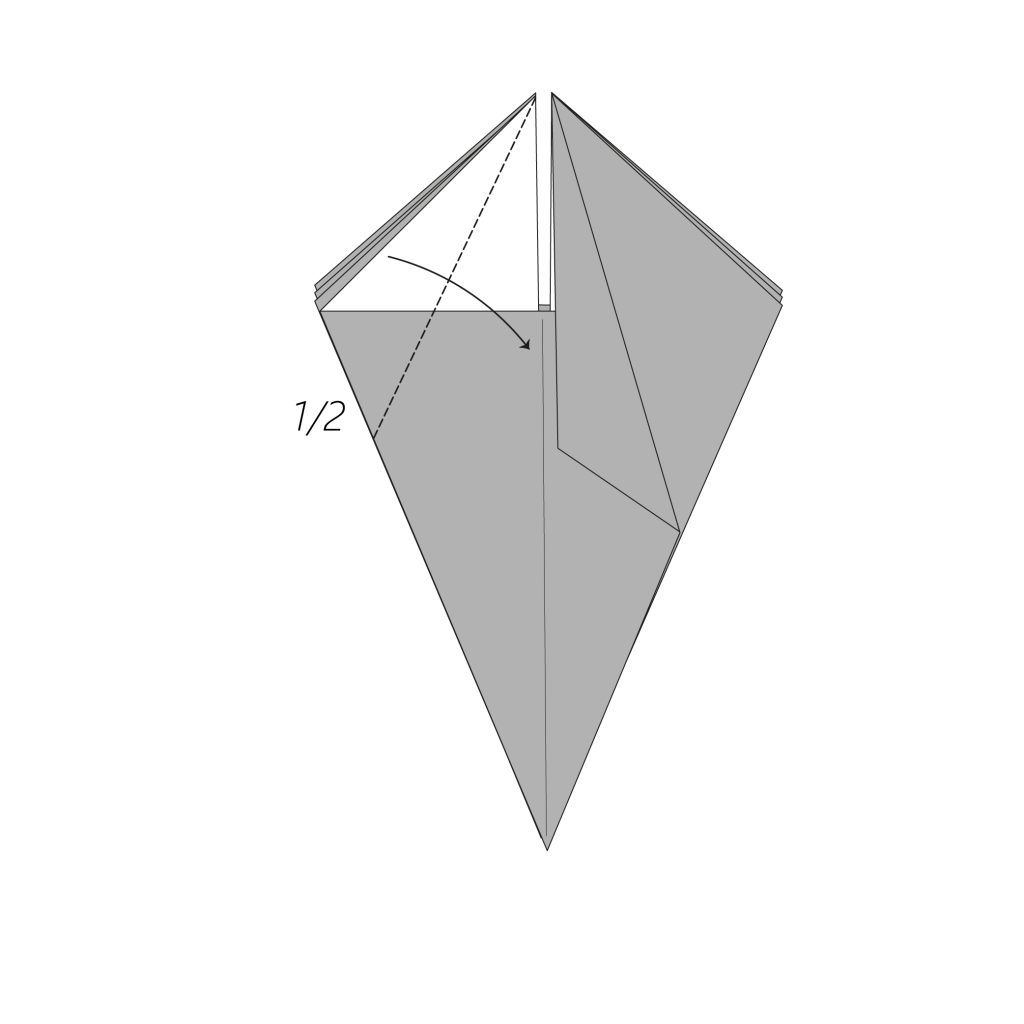
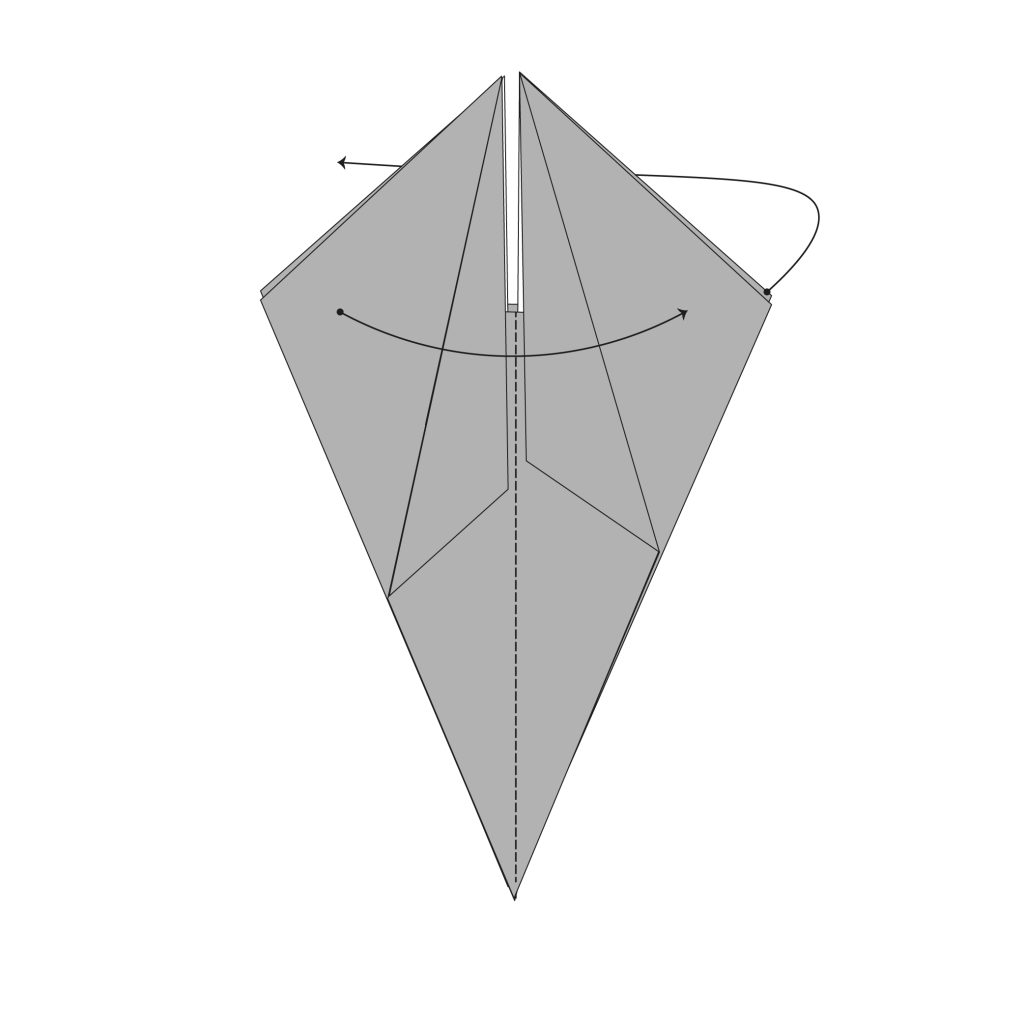
Step 15
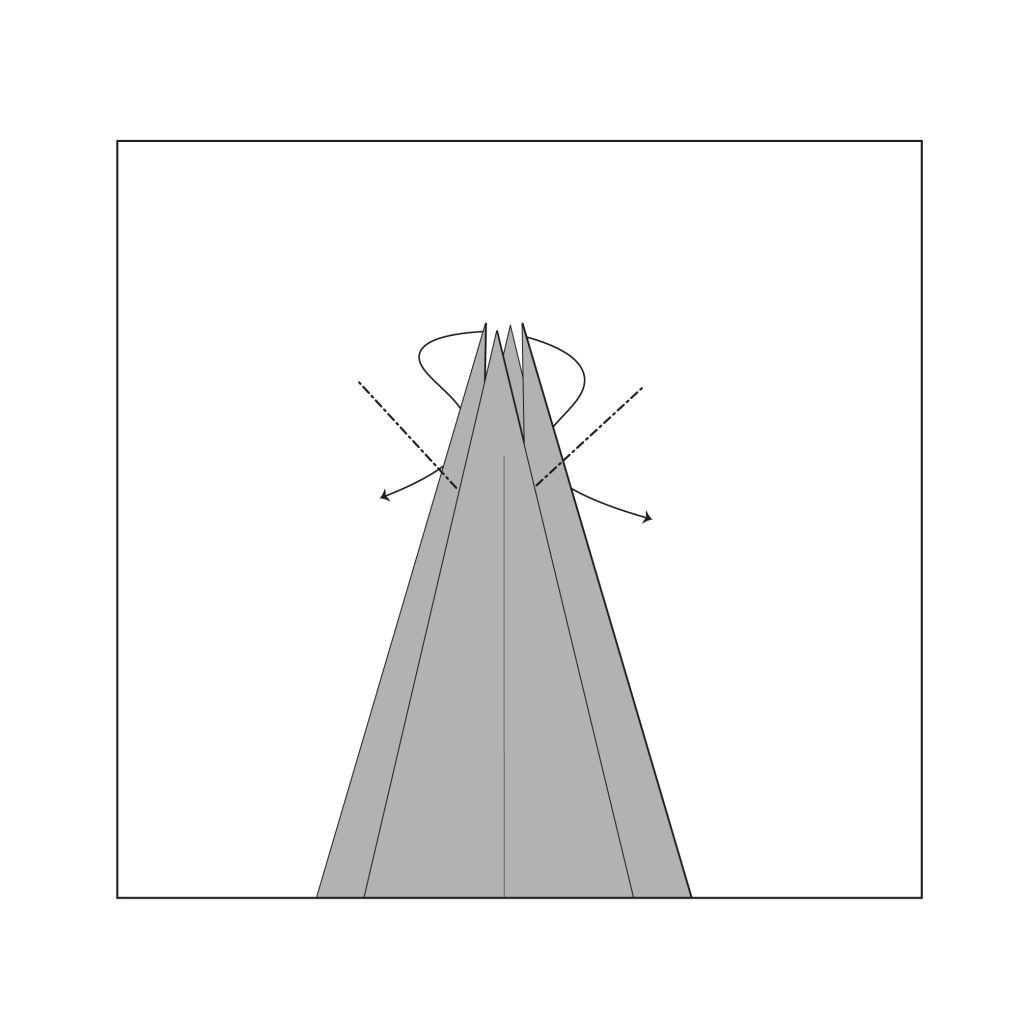
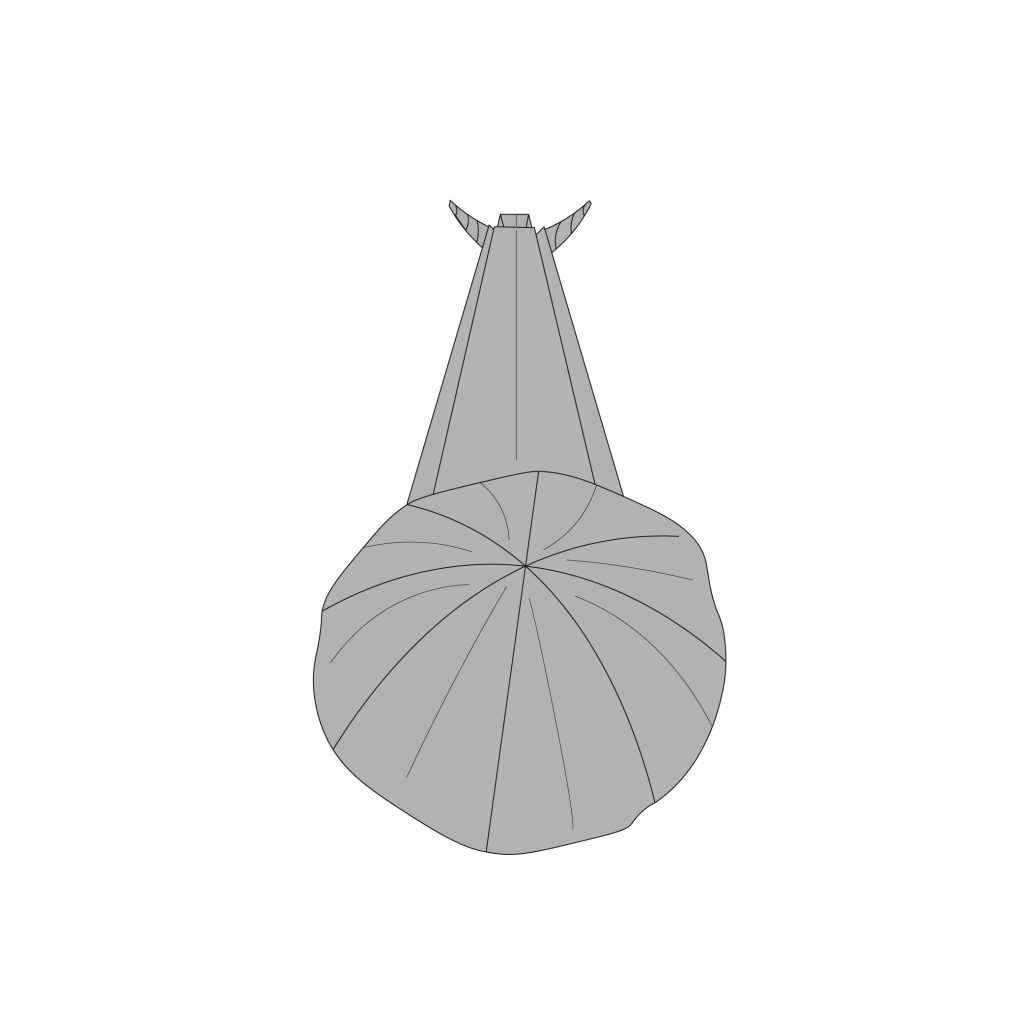
Now, let’s focus on the top of the model and carefully inside reverse-fold the two flaps on the side. These will become the snail’s antennas.
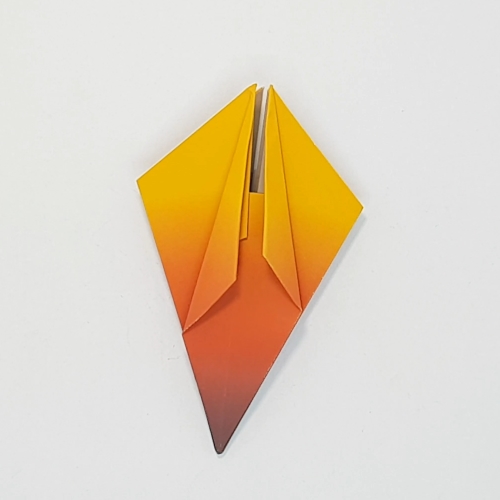
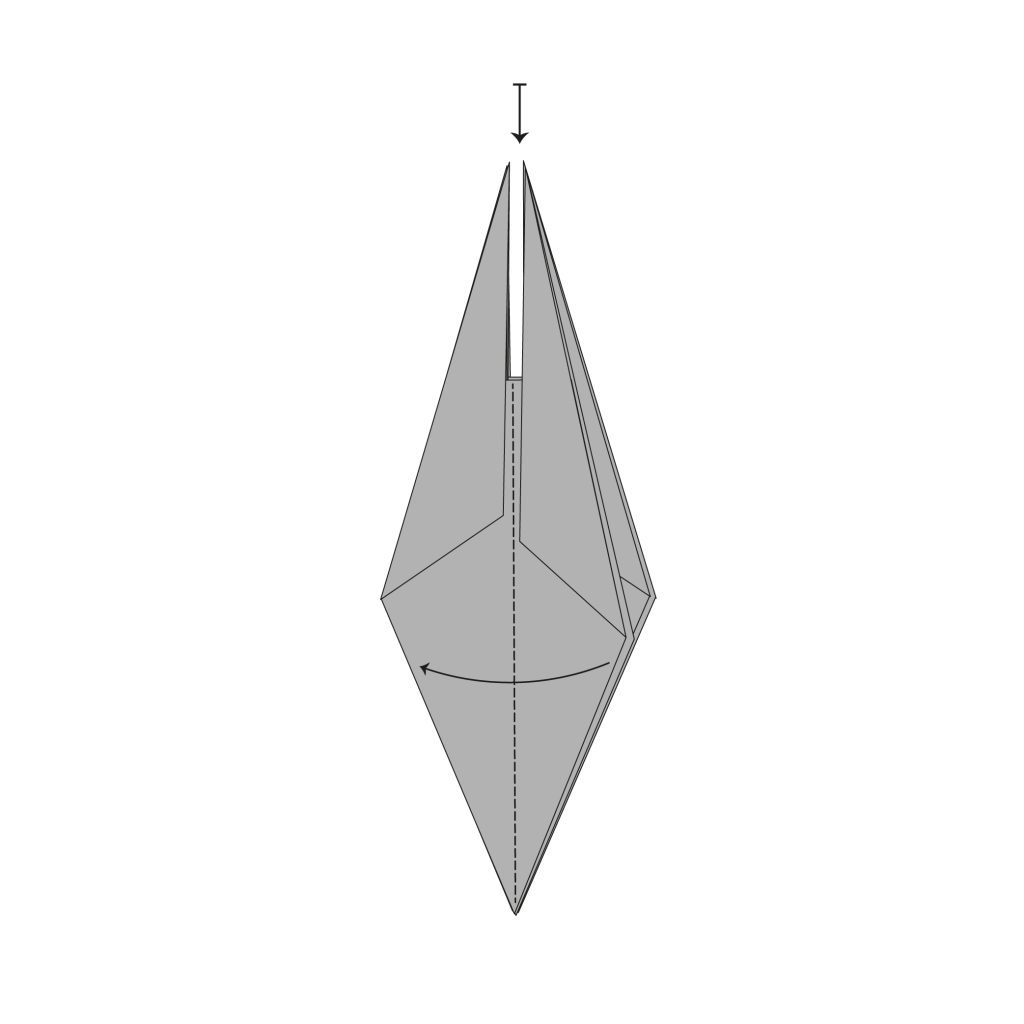
Step 16

Tuck in the two center flaps.
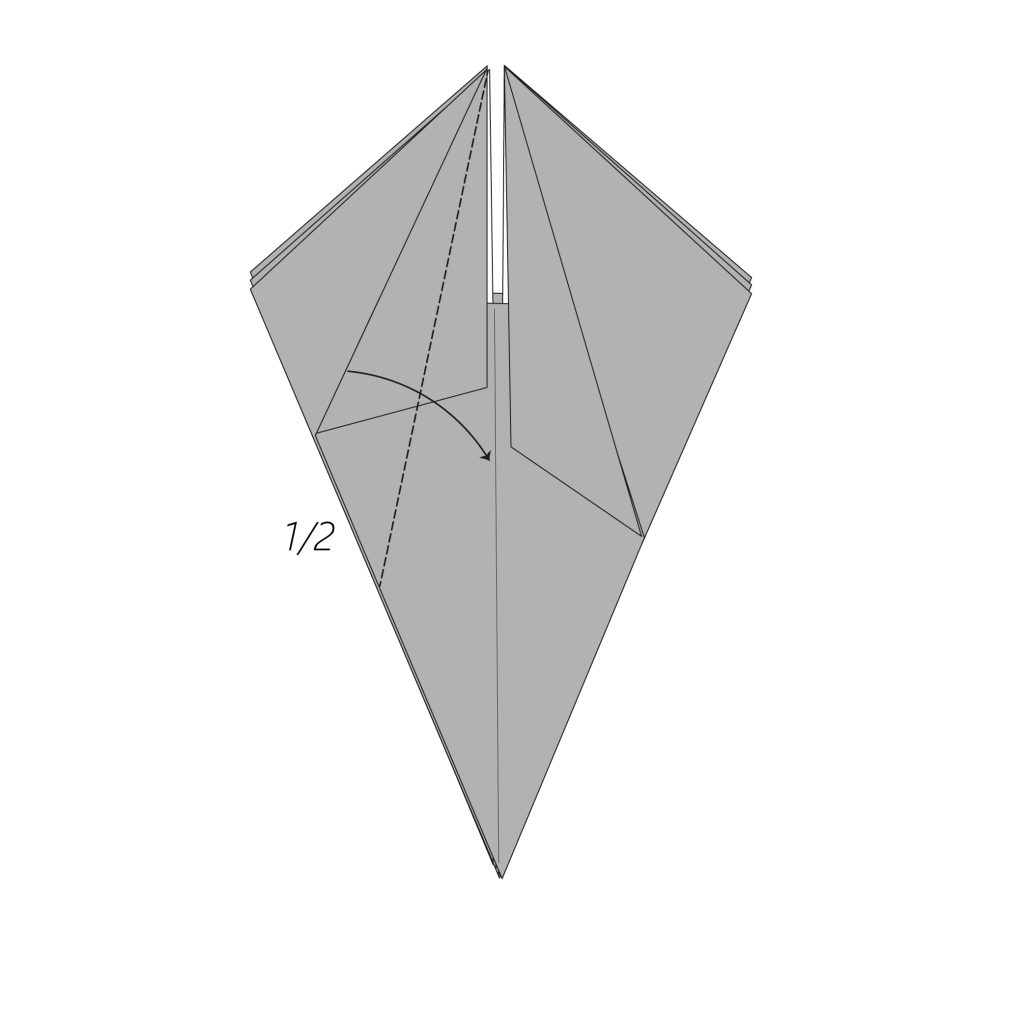
Step 17
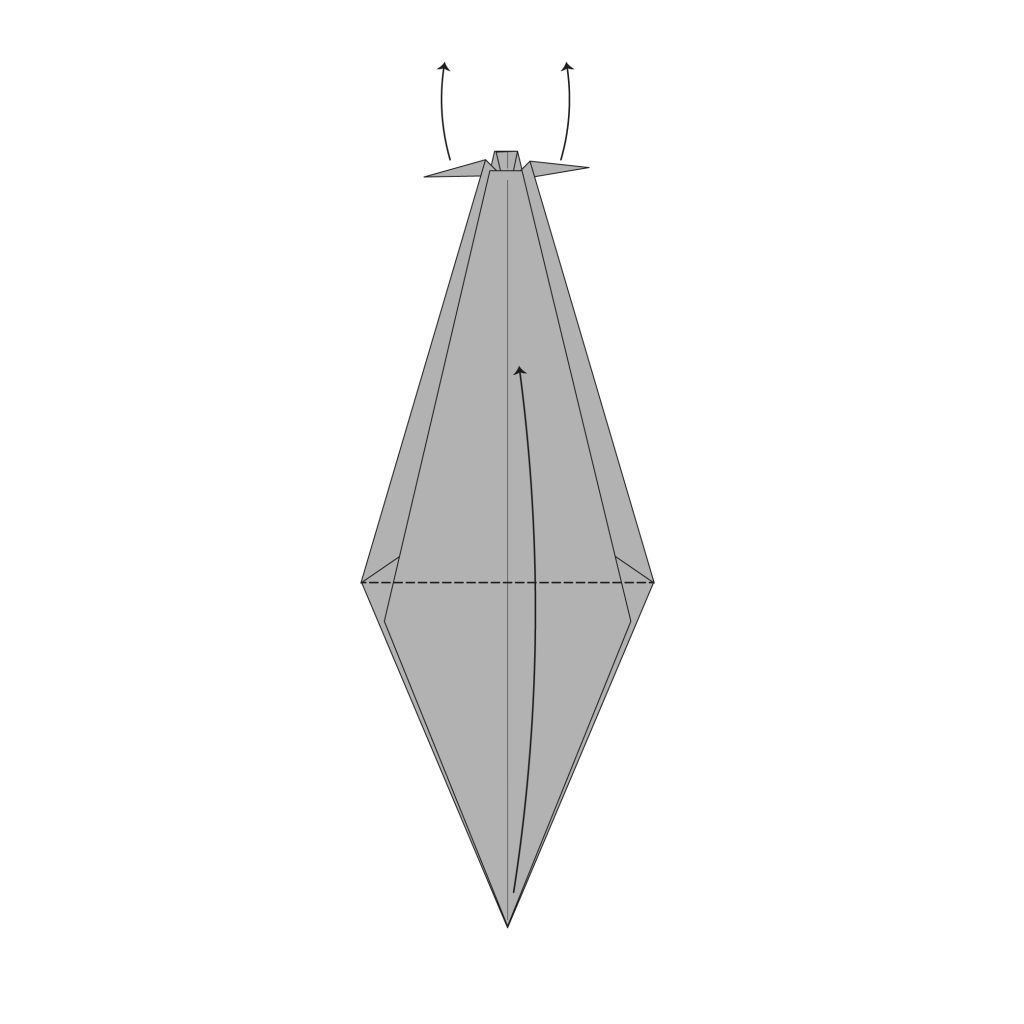
Raise the snail’s antennas and bring the bottom corner up.
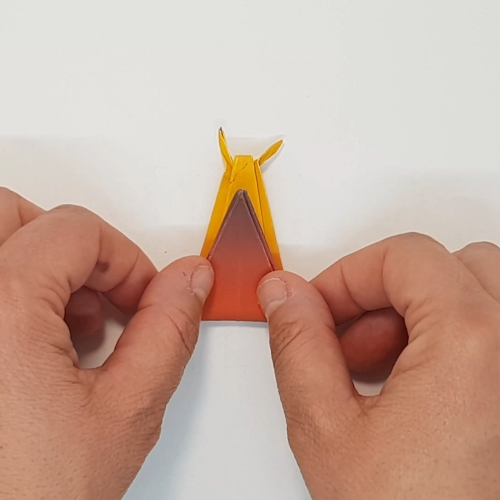
Step 18
Swirl and shape the antennas to your taste.
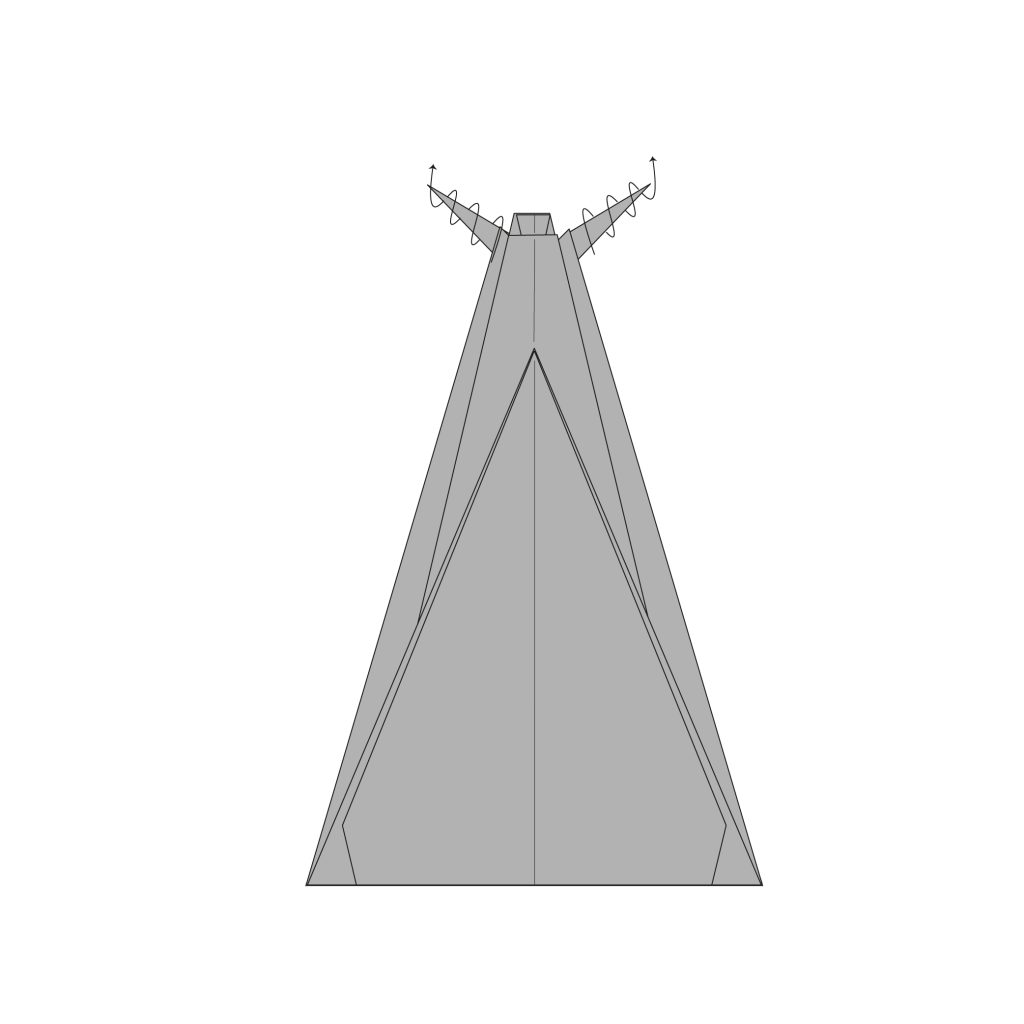
Step 19
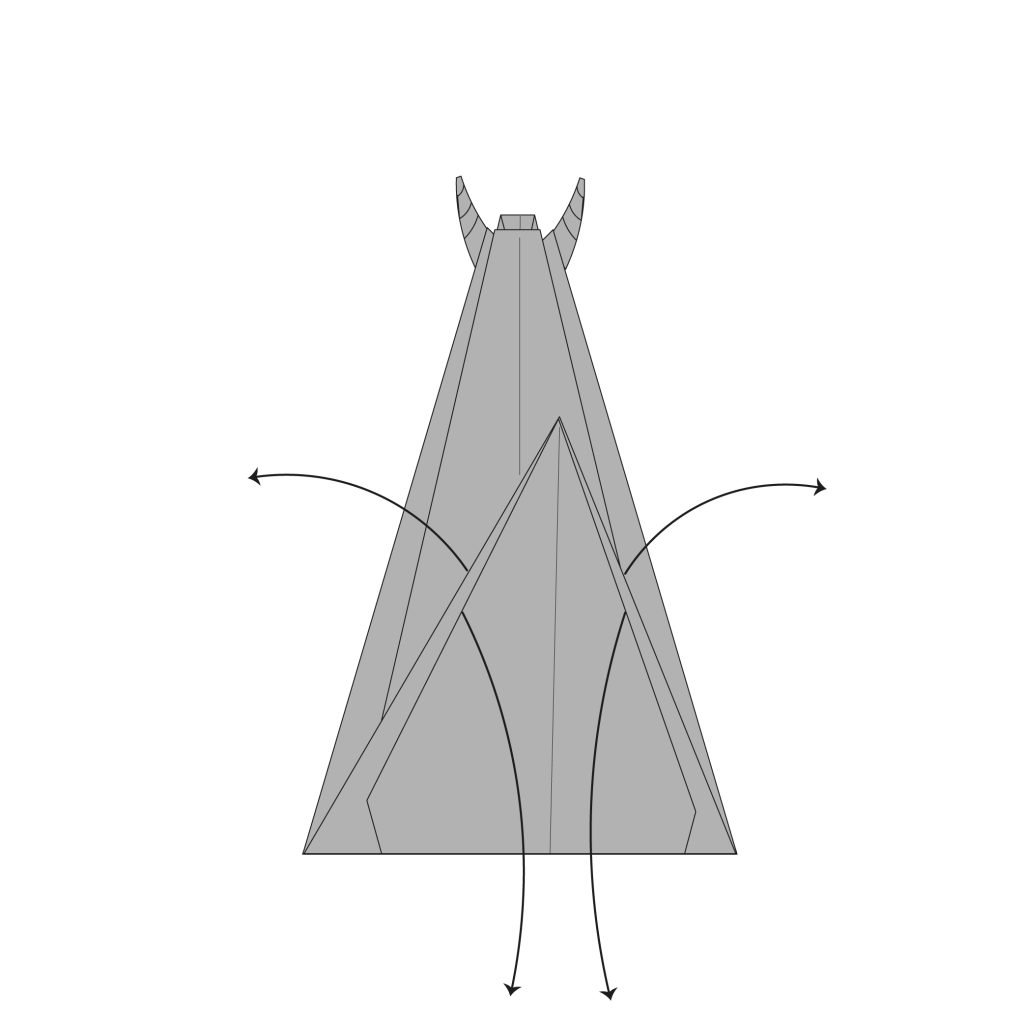
Lift the top layer. Then, gently open and stretch the vertical layers until it resembles a balloon (this will become the snail’s shell).
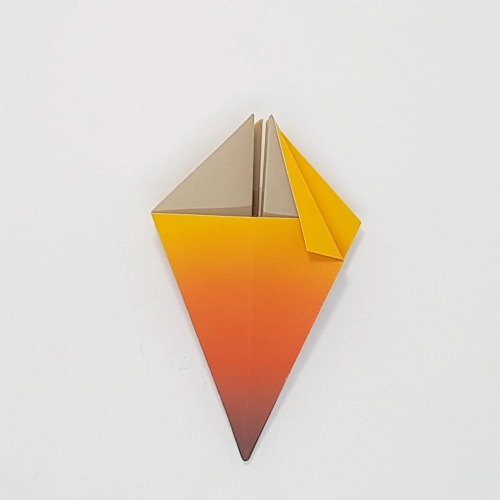
The Completed Origami Snail
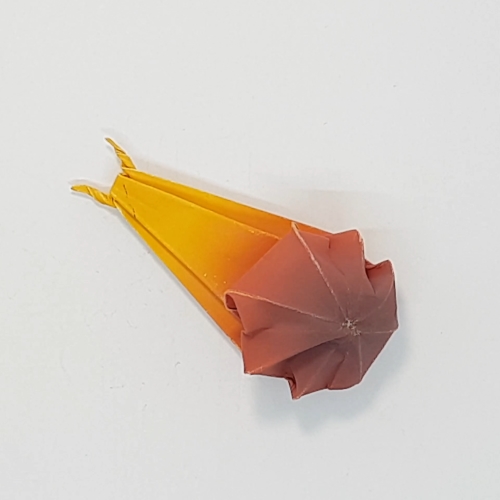
Well done! You’ve just made your very own origami snail.
Whether you’re using it for decorating, adding to your collection, or simply enjoying a peaceful activity on a rainy afternoon, your paper snail brings a touch of nature indoors.
Thanks for taking the time to fold with me. Don’t hesitate to share your creations with us in the comments or on socials.
The post How to Fold a Traditional Origami Snail appeared first on Origami.me.