
This origami ghost offers a fun challenge for those looking to improve their origami skills while still being accessible to advanced beginners seeking something new.
Designed by Valerio Cicolini, this model features an elegant 3D shape that brings a floating ghost to life.
While we used gray paper in this tutorial, we recommend using white paper to highlight its ghostly shape.
For a perfect presentation, try placing it on a display base to keep it upright and add an extra touch of magic.
Origami Ghost Step-by-Step Instructions
- Difficulty: Low Intermediary
- Folding time: 20 minutes
- Model designer: Valerio Cicolini
- Paper: White Kami 15×15 cm (5.9×5.9 in)
Step 1
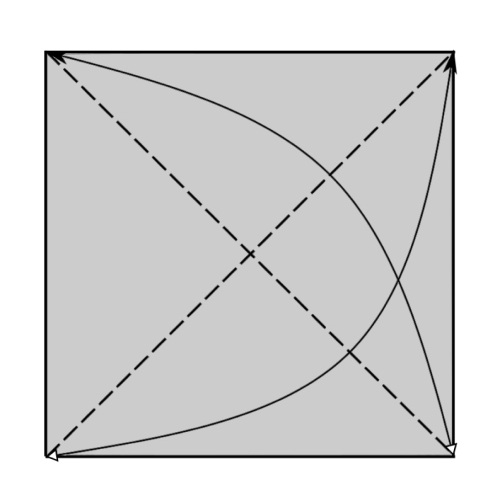
Start with the colored side of the paper facing up. Fold and unfold both diagonals.
Step 2
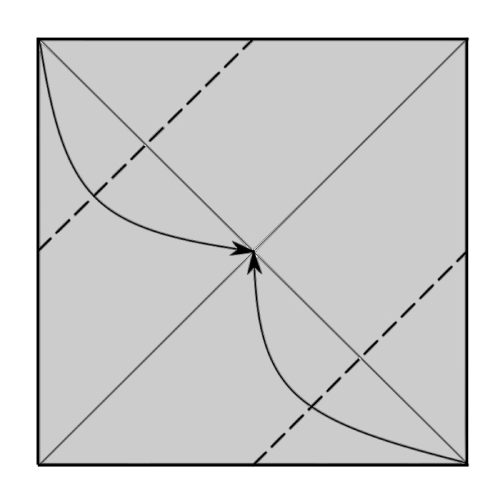
Fold and unfold the top left and top right corners to the center.
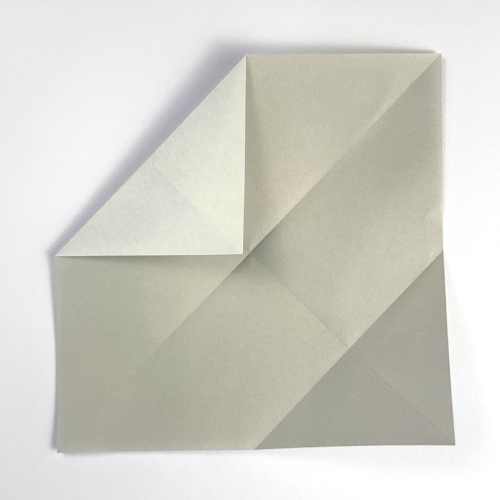
Step 3
Mountain fold the model in half along the diagonal.
Step 4

Fold and unfold along the dotted line, from the left corner to the bottom right corner. Then, repeat behind.
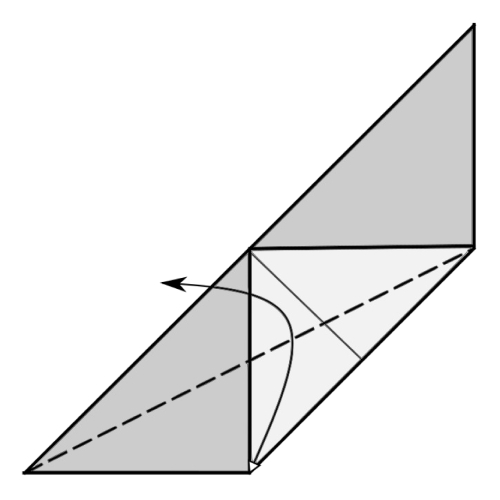
Step 5

Align the bottom edge to the crease created in Step 4 and fold along the dotted line. Then, repeat behind.
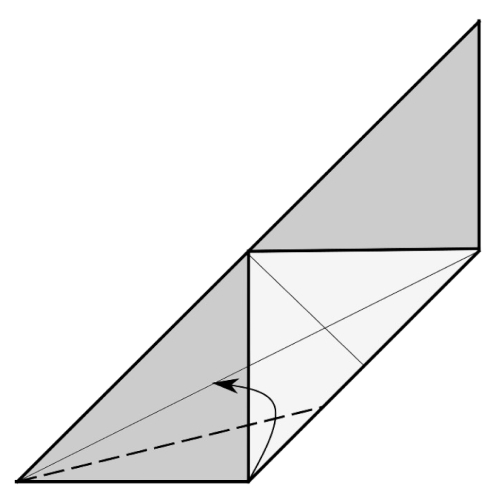
Step 6
Fold along the crease created in Step 4. Then, repeat behind.
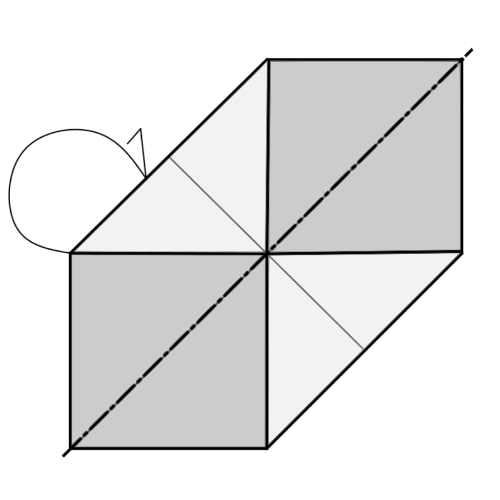
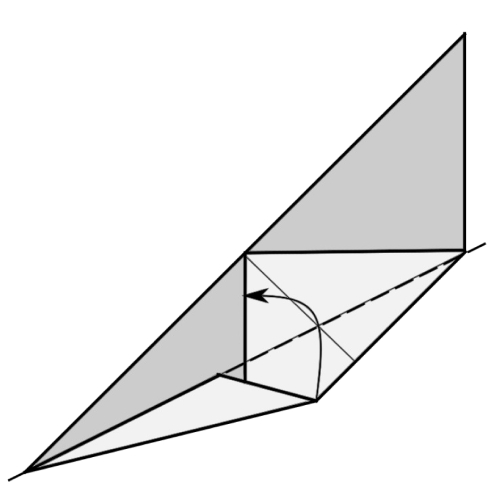
Step 7

Inside reverse fold along the dotted line.
Step 8

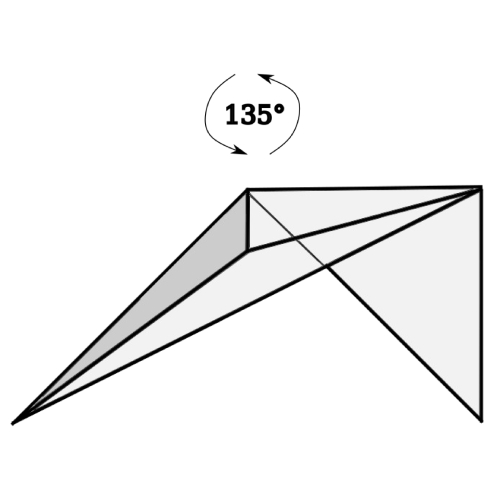
Rotate the model 135° counterclockwise.
Step 9
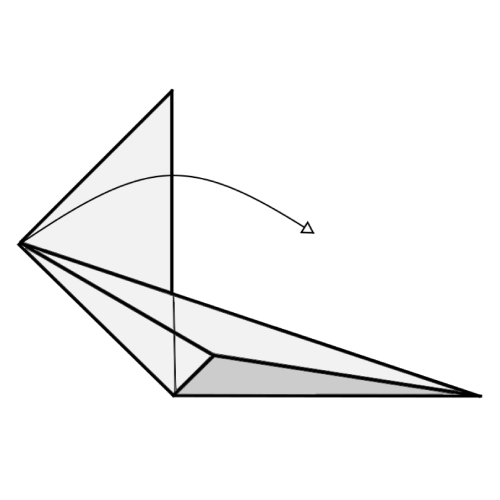
Fold the top flap to the right.
Step 10
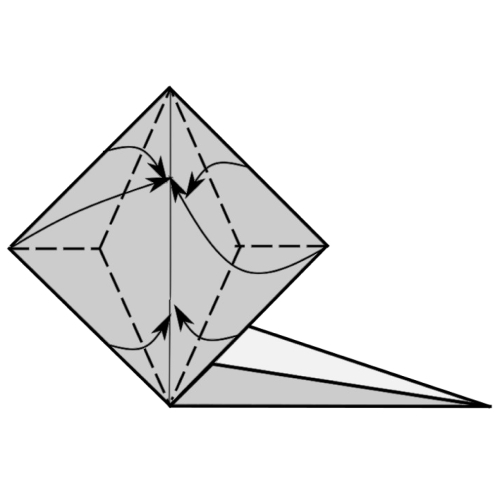
Fold along the dotted lines, similar to a fish base.
Step 11

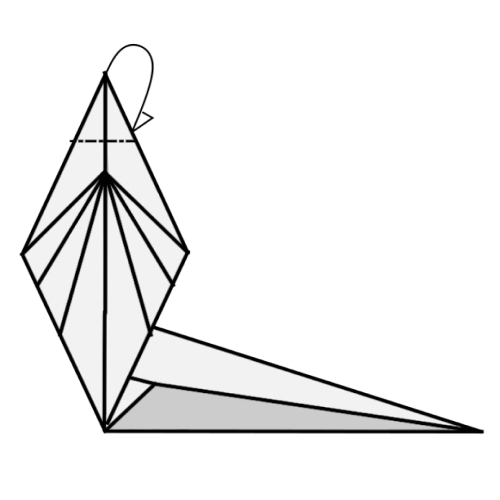
Mountain fold along the dotted line.
Step 12
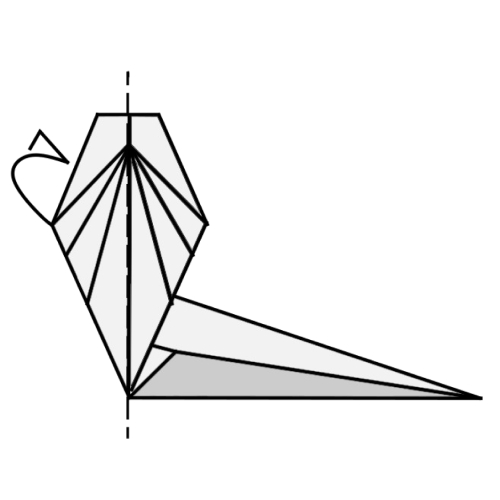
Fold in half along the dotted line, using the existing crease.
Step 13
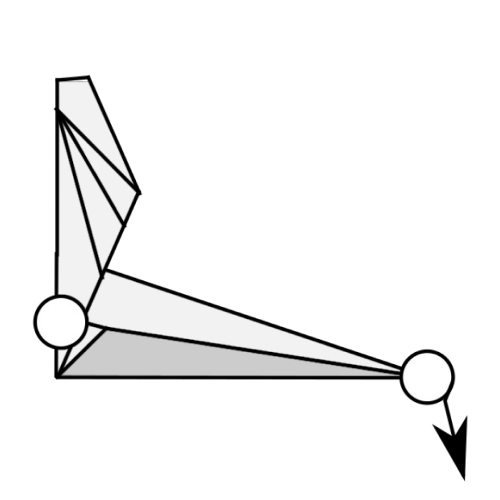
Pinch the two reference points and pull the lower part of the model down.
Step 14
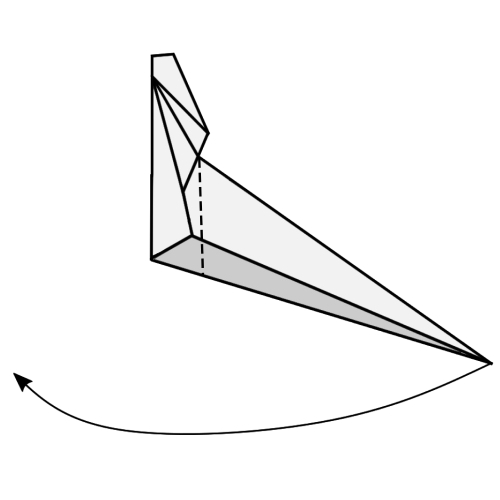
Outside reverse fold along the dotted line.
Step 15
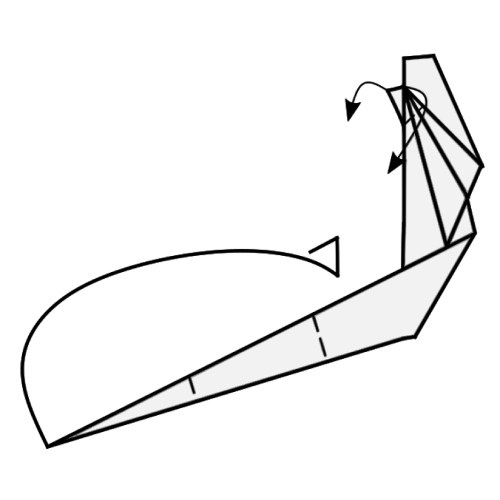
Shape the arms and lower part of the model.
 Folding tip: Use a pen or any cylinder and roll the paper around the ghost’s arms and tail.
Congratulations on folding this ethereal origami ghost!
Feel free to get creative and shape it further by adjusting the arms, rounding the main body, and adding a hood. These little tweaks will give your ghost a more classic appearance.
Don’t hesitate to share your creations with us in the comments or on socials. We’d love to see them!
The post How to Fold an Origami Ghost appeared first on Origami.me.